









What to Pack for Every Type of Trip

Home » Travel Planning

Last updated: April 2026 by Corey Gasman

From the Editor:

After two decades of traveling, I have learned that packing well is never one-size-fits-all. I pack differently for a month in Mexico during a Minnesota winter than I do for a fall trip to Europe, a ski weekend out west, or a three-night city getaway to New York, Las Vegas, or San Francisco.

I still use the carry-on method almost every time, no matter how long I am gone. The difference is what earns space inside the bag. A long weekend with theater tickets and nice dinners needs a different setup than a hot-weather trip through Singapore, Bali, and the Komodo Islands.

This guide breaks packing down by trip type so you can bring what actually fits the trip you booked and skip the stuff that only sounds useful while you are still at home.

Start Here: Pack for the Trip You Are Actually Taking

Knowing what to pack for different types of trips is the easiest way to avoid overpacking and bring the right gear for the trip you actually booked.

The biggest packing mistake is treating every trip the same. A beach trip needs sun protection, fast-drying fabrics, and a plan for sand and water. A Europe trip needs comfortable shoes, a small capsule wardrobe, and luggage that can handle stairs, trains, and cobblestones.

Before you start filling your bag, think through three things: the weather, how often you are moving, and what your days actually look like. That simple filter will save more space than any packing hack.

This is how I pack every trip: choose the bag, build the clothing system, lock in tech, then fill in the small items. Everything in this guide follows that same approach.

Quick Packing Rule:
Hot and humid trip: breathable fabrics and quick-dry gear
Europe city trip: polished basics and great walking shoes
City hopping: smaller luggage and easier access
Long-term travel: laundry, tech, and repeat-use clothing

If you only remember one thing: pack for movement, not for imaginary outfit changes.

If you are building your full travel setup, start with the Travel Planning Guide and the Packing & Gear Guide.

TLGA Rule: Your packing list should match the trip. Do not pack for every possible scenario. Pack for the trip you actually booked.

Building your full setup?

Start here: Packing & Gear Guide

Trying to pack lighter?

Read: One Bag Travel Guide

A group of people relaxing on the shore of a tropical beach, with turquoise water and a city skyline visible in the background under a clear sky.

Beach packing is less about outfit variety and more about managing sun, sand, and waves.


How to Decide What to Pack for Your Trip

Before you think about individual items, decide what your trip demands. Most packing mistakes happen because people pack from fear instead of from the actual itinerary.

This guide covers exactly what to pack for different types of trips, from short weekend getaways to long-term international travel.

Use this quick framework before every trip:

  • Climate: Hot, cold, humid, rainy, dry, or unpredictable?
  • Movement: One hotel base or changing cities every few days?
  • Activities: Beaches, museums, restaurants, hikes, work, or transit-heavy days?
  • Luggage limits: Carry-on only, personal item only, or checked bag?
  • Laundry: Can you wash clothes during the trip, or do you need a full week of outfits?

Once you answer those questions, your packing list gets much clearer. You stop packing random “just in case” items and start building a travel setup that supports the actual trip.

Pro Tip: Do not start with clothes. Start with your travel days. If you are taking trains, ferries, stairs, or budget airlines, the size of your bag matters as much as what is inside it.

For a deeper packing setup, use the One Bag Travel Guide and the Travel Capsule Wardrobe Guide.

People walking through the historic Praça do Comércio in Lisbon, Portugal, featuring the yellow buildings and the Rua Augusta Arch under a clear blue sky.

A one-week Europe trip works best with a small capsule wardrobe, comfortable shoes, and pieces that can handle both daytime walking and dinner out.


What to Pack for 1 Week in Europe

A one-week Europe trip is all about balance. You want to look put-together, stay comfortable walking all day, and still move easily through train stations, hotel stairs, and old streets.

The best setup is a simple capsule wardrobe built around neutral colors. Everything should work together so you are not packing seven totally separate outfits.

The best packing approach

Use the 5-4-3-2-1 method as a starting point. It gives you enough variety without turning your carry-on into a stuffed closet.

  • 5 tops: Mix of breathable shirts, tees, or button-downs
  • 4 bottoms: Pants, trousers, skirts, or shorts depending on season
  • 3 pairs of shoes: Walking shoes, dressier option, and weather-specific pair if needed
  • 2 layers: Lightweight sweater, jacket, trench, or overshirt
  • 1 accessory set: Sunglasses, belt, scarf, jewelry, or hat

What matters most

  • Footwear: Comfortable walking shoes are non-negotiable
  • Layering: Europe weather can shift quickly, especially in spring and fall
  • Tech: Bring a compact charger and the right adapter
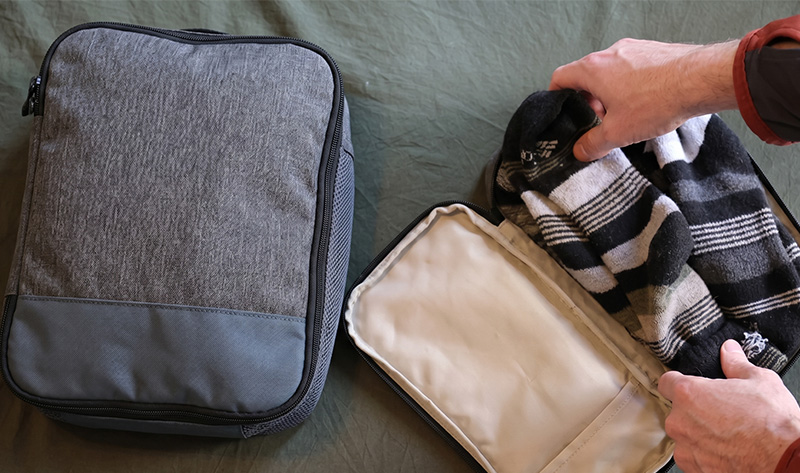
  • Organization: Compression cubes help keep a small bag manageable

Pro Tip: Pack a reusable canvas tote. It weighs almost nothing and is useful for groceries, day trips, laundry, and overflow items.

For Europe trips, also read the Best Travel Chargers Guide and the One Bag Travel Backpacks Guide.

Three people walking through a narrow cobblestone street in Rome during the summer, with historic buildings.

European summer packing is about staying cool without looking like you are dressed for the gym all day.


What to Pack for a Summer Europe Trip

Summer in Europe demands a wardrobe that balances heat, long walking days, and a little polish. Athletic wear may be comfortable, but it can also make you stand out quickly in restaurants, museums, and city neighborhoods.

The goal is simple: one small bag, one polished outfit, and no wasted space.

Core summer Europe packing list

  • Walking shoes: Low-profile sneakers that can handle long days
  • Dressier footwear: Leather loafers, refined sandals, or a clean evening shoe
  • Bottoms: Chinos, linen trousers, skirts, or tailored shorts
  • Tops: Breathable shirts, lightweight button-downs, or polished tees
  • Layer: Light overshirt or sweater for cool evenings and trains
  • Tech: Multi-port GaN charger and slim power bank
  • Security: Crossbody sling, money belt, or front-pocket setup in crowded areas

Pro Tip: Leave the massive hard-shell suitcase at home. A 40-liter travel backpack or a small carry-on roller is much easier on cobblestones, stairs, and regional trains.

For clothing strategy, use the Travel Capsule Wardrobe Guide. For personal safety habits, read the Travel Safety Guide.

People standing on a rock in Central Park, looking out over lush green trees toward the towering skyscrapers of the Midtown Manhattan skyline under a hazy

A long weekend trip is where packing light really pays off. You need just enough variety for daytime exploring, nicer dinners, and travel days without overthinking it. A summer weekend in New York requires a balance of breathable fabrics for humidity and polished layers for air-conditioned interiors


What to Pack for a Long Weekend Getaway

A three-day, two-night trip sounds easy to pack for, but it is also where people overdo it fast. New York, Las Vegas, San Francisco, Chicago, or a quick couples weekend usually means daytime walking, nicer dinners, maybe a show, and limited time to deal with luggage.

The goal is simple: one small bag, one polished outfit, comfortable shoes, and enough flexibility to look good without bringing half your closet.

Core long weekend packing list

  • Bag: Small carry-on, weekender bag, or personal-item backpack
  • Clothing: Two daytime outfits and one nicer dinner or theater outfit
  • Footwear: Comfortable walking shoes plus one dressier option if needed
  • Layer: Lightweight jacket, blazer, cardigan, or overshirt
  • Tech: Phone charger, compact wall charger, and power bank
  • Toiletries: Small dopp kit or clear pouch with only the basics

The easiest formula

  • 1 travel outfit
  • 2 tops
  • 1 extra bottom
  • 1 nicer outfit or upgraded layer
  • 2 pairs of shoes max
  • Minimal toiletries

Pro Tip: For a long weekend, do not pack “options.” Pack complete outfits. You only need a few looks, and each one should already make sense before it goes in the bag.

For this kind of trip, the Travel Capsule Wardrobe Guide and One Bag Travel Guide are the best supporting reads.

Beach trips are less about outfit variety and more about handling sun, sand, humidity, and wet gear.


What to Pack for a Beach Trip

Beach destinations require gear that handles sun, salt, sand, sweat, and water. Whether you are heading to a tropical island or a coastal city, moisture management matters more than bringing a bunch of extra outfits.

Heavy cotton is usually the wrong move. It absorbs moisture, dries slowly, and gets uncomfortable fast in humid weather.

Core beach packing list

  • Swim: Two swimsuits so one can dry while you wear the other
  • Sun protection: Hat, polarized sunglasses, and reef-safe sunscreen
  • Clothing: Linen shirts, lightweight synthetics, and quick-dry pieces
  • Footwear: Water-resistant sandals and breathable slip-ons
  • Beach gear: Microfiber towel, dry bag, and small pouch for wet items
  • Day bag: Something that can handle sand, sunscreen, and water bottles

Local Guide Tip: Buy heavy liquids like aloe vera and standard sunscreen at your destination when it makes sense. It saves luggage weight and helps you stay within airport liquid limits.

For U.S. airport carry-ons, TSA’s current liquids rule limits most liquids, gels, and aerosols to travel-size containers of 3.4 ounces or less in a quart-size bag. You can review the current rule here: TSA liquids rule.

A young woman wearing glasses and a denim jacket stands on a city street, looking down at her smartphone while holding a small black bag.

City hopping rewards smaller bags, better organization, and clothing that works across different settings.


What to Pack for City Hopping

City hopping is where overpacking really catches up with you. If you are changing hotels every few days, catching trains, walking through stations, or dealing with apartment stairs, every extra pound matters.

Your setup should be easy to carry, easy to access, and simple to repack.

Core city-hopping packing list

  • Main bag: Travel backpack or small durable roller
  • Day bag: Secure sling, small backpack, or crossbody bag
  • Clothing: Smart-casual, wrinkle-resistant basics
  • Transit gear: Noise-canceling earbuds, water bottle, and lightweight layer
  • Documents: Passport copy, tickets, hotel addresses, and emergency contacts saved offline
  • Organization: Packing cubes so you can repack quickly

Pro Tip: Keep a digital copy of your passport, transit passes, and hotel addresses downloaded offline on your phone. Also keep a physical backup tucked away in your main luggage.

If you are choosing a bag for this kind of trip, read the One Bag Travel Backpacks Guide.

A woman wearing glasses and a sleeveless top sits at a table, focused on her laptop while wearing earbuds in a bright, modern indoor space.

Long-term travel often means balancing exploration with remote work, requiring a reliable tech setup and a comfortable space to focus.


What to Pack for Long-Term Travel

Long-term travel changes the packing equation. You are not packing for every day of the trip. You are packing for laundry cycles, repeat outfits, work needs, comfort, and durability.

For most long trips, seven days of clothing is enough. Beyond that, your tech setup, health basics, and laundry plan matter more than extra outfits.

Core long-term travel packing list

  • Clothing: Seven days of easy-to-wash basics
  • Fabrics: Merino wool, synthetics, linen, and durable blends
  • Tech: Laptop stand, compact mouse, charger, backup cables, and power bank
  • Data: External drive, cloud backup, password manager, and VPN
  • Health: Basic first aid, pain relievers, stomach medicine, and any personal medication
  • Toiletries: Solid shampoo, conditioner, soap, and travel-size essentials

Pro Tip: Solid toiletries are one of the easiest upgrades for long-term travel. They last a long time, do not leak, and help you avoid liquid limits.

For your work and charging setup, read the Best Minimal Tech Kits Guide and the Best Travel Chargers Guide.

Hot-weather Asia trips need breathable clothing, moisture control, and a smart plan for keeping tech dry and charged.


What to Pack for a Summer Asia Trip

A summer trip through Southeast Asia or other hot, humid destinations requires a very different packing list than Europe. The problem is not just heat. It is sweat, rain, boat transfers, aggressive air conditioning, and long days outside.

The goal is to stay cool, respect local dress norms, and keep your phone, camera, and chargers protected from moisture.

Core summer Asia packing list

  • Clothing: Lightweight linen, synthetics, and breathable shirts
  • Layer: Thin long sleeve for temples, planes, trains, and freezing indoor AC
  • Footwear: Breathable walking shoes and water-resistant sandals
  • Rain: Packable rain jacket or small umbrella
  • Tech protection: Dry bag, zip pouches, and waterproof phone protection if needed
  • Comfort: Electrolytes, hand sanitizer, wipes, and a small towel

Local Guide Tip: In places like Singapore, malls, restaurants, trains, and airports can feel freezing compared with the heat outside. Keep one light layer clipped to your daypack.

For destination-specific health notes and vaccine guidance, check the CDC Travelers’ Health page before international trips.
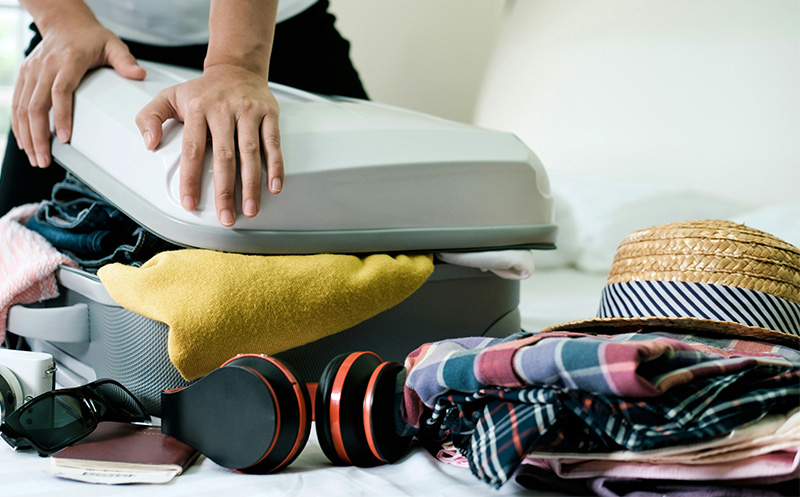
The best packing list also includes what to leave behind. Most bags get heavy because of things people never actually use.


What Not to Pack for Most Trips

The easiest way to pack better is to remove the things that sound useful at home but become dead weight on the road. You do not need to prepare for every possible situation. You need to prepare for the trip you are actually taking.

Items I would usually skip

  • Big cotton sweatshirts: They are bulky, slow to dry, and hard to pack
  • Too many shoes: Shoes eat space faster than almost anything else
  • Full-size toiletries: Buy heavy liquids locally when it makes sense
  • Extra jeans: One pair is usually enough unless your trip truly requires more
  • Too many “nice” outfits: Pack one or two polished looks, not a separate outfit for every dinner
  • Duplicate tech: One clean charging setup beats a pouch full of random cords

Pro Tip: The phrase “just in case” is usually where overpacking starts. If you can buy it easily, borrow it, or survive without it, it probably does not need to come.

For smaller items that actually do earn space, see the Small Travel Items Worth Packing Guide.

Quick Packing Comparison by Trip Type

Use this table as a quick decision guide before you start packing.

Trip Type Main Priority Best Bag Setup What Matters Most
1 Week in Europe Polished carry-on packing Carry-on roller or 35L to 40L backpack Walking shoes, capsule wardrobe, layers
Summer Europe Heat plus style Small roller or backpack Breathable fabrics, clean shoes, light layers
Long Weekend Getaway Small bag, polished basics Weekender, personal item, or small carry-on Comfortable shoes, one nicer outfit, minimal toiletries
Beach Trip Sun, sand, and water Carry-on plus beach-friendly day bag Quick-dry clothing, sunscreen, dry bag
City Hopping Mobility Travel backpack or small roller plus sling Easy access, light weight, fast repacking
Long-Term Travel Repeat-use setup Backpack or carry-on with strong organization Laundry, tech, backups, durable clothing
Summer Asia Heat and humidity Light main bag plus moisture-safe daypack Breathable fabrics, AC layer, tech protection

Final Checklist Before You Zip the Bag

Before you leave, do one final pass through the actual trip. Not the fantasy version of the trip. The real one.

  • Can I carry this bag up stairs without hating my life?
  • Do my shoes work for the amount of walking I am actually doing?
  • Can I mix and match most of my clothing?
  • Do I have one layer for planes, trains, restaurants, and cool evenings?
  • Is my charging setup simple and complete?
  • Do I have offline access to hotel info, tickets, maps, and passport copies?
  • Did I remove at least three things I packed “just in case”?

Final Rule: A great packing list does not mean bringing everything. It means bringing the right things for the trip you are actually taking.

Practical guides on packing lighter, choosing better travel gear, building a tech kit, and bringing only what actually earns space in your bag.

MAIN GUIDE

Travel Planning

Start with the bigger travel planning hub for trip timing, packing, budgeting, safety, and smarter decisions before you go.

Read More
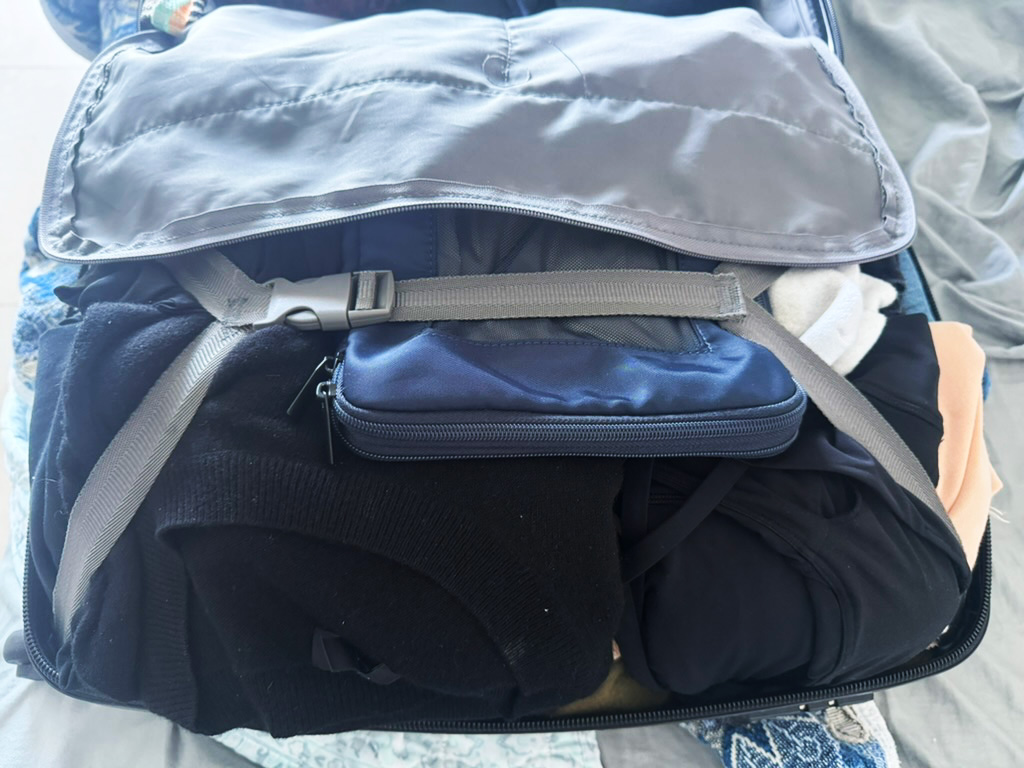
PACKING HUB

Packing & Gear Guide

A practical overview of what to pack, what to skip, and how to build a lighter travel setup that still works.

Read More

PACK LIGHTER

One Bag Travel Guide

Learn how to travel with one bag, avoid overpacking, and keep your setup simple without feeling underprepared.

Read More
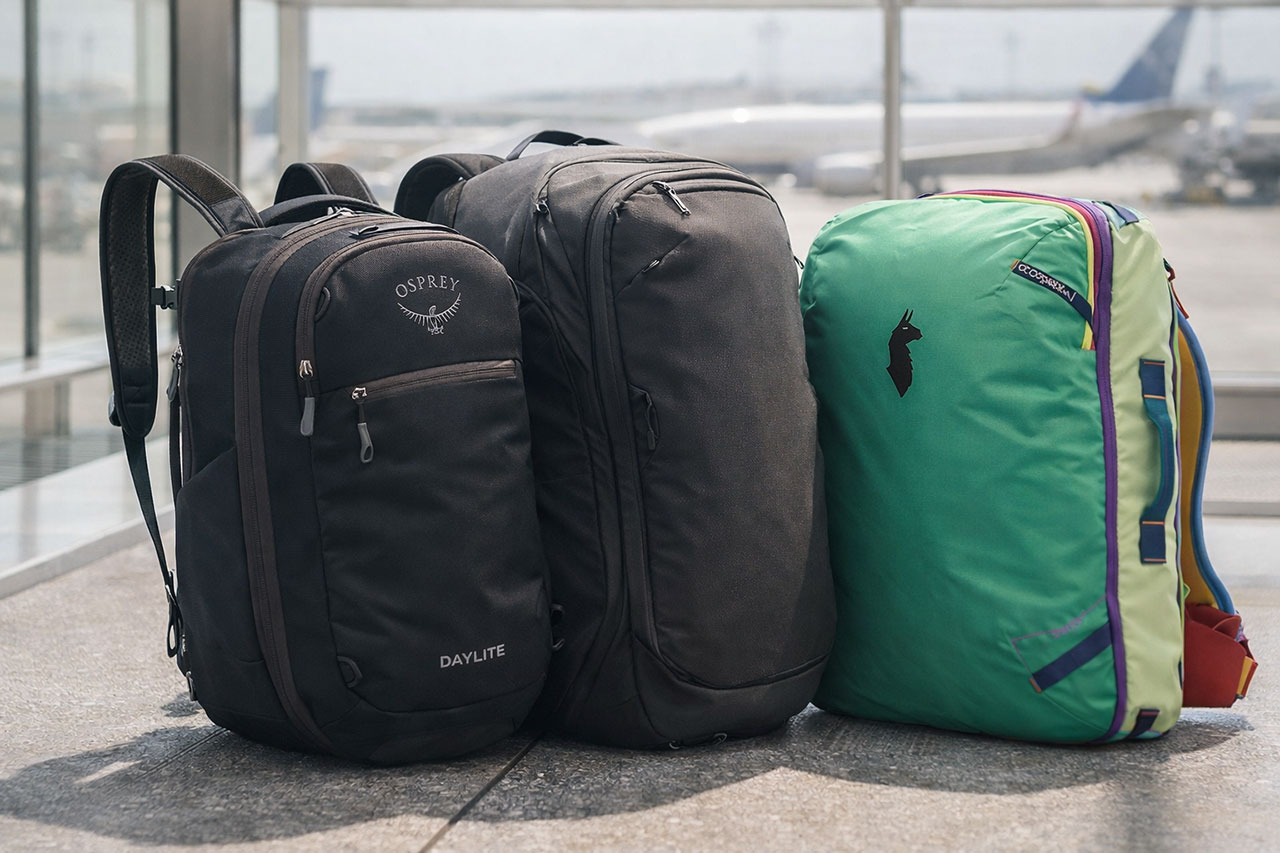
BACKPACKS

One Bag Travel Backpacks

Choose a travel backpack that fits your trip style, carry-on needs, and the way you actually move through airports and cities.

Read More

CLOTHING

Travel Capsule Wardrobe

Build a small travel wardrobe with pieces that mix, layer, and work harder than a suitcase full of extras.

Read More

CHARGING

Best Travel Chargers

Simplify your charging setup with better wall chargers, cables, adapters, and power options for real travel days.

Read More
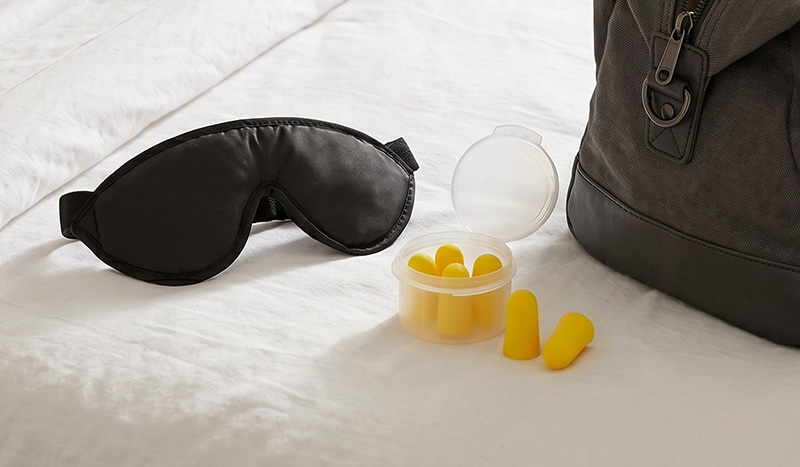
SMALL ITEMS

Small Travel Items Worth Packing

The little things that make travel days easier, hotel rooms more comfortable, and packing mistakes less likely.

Read More
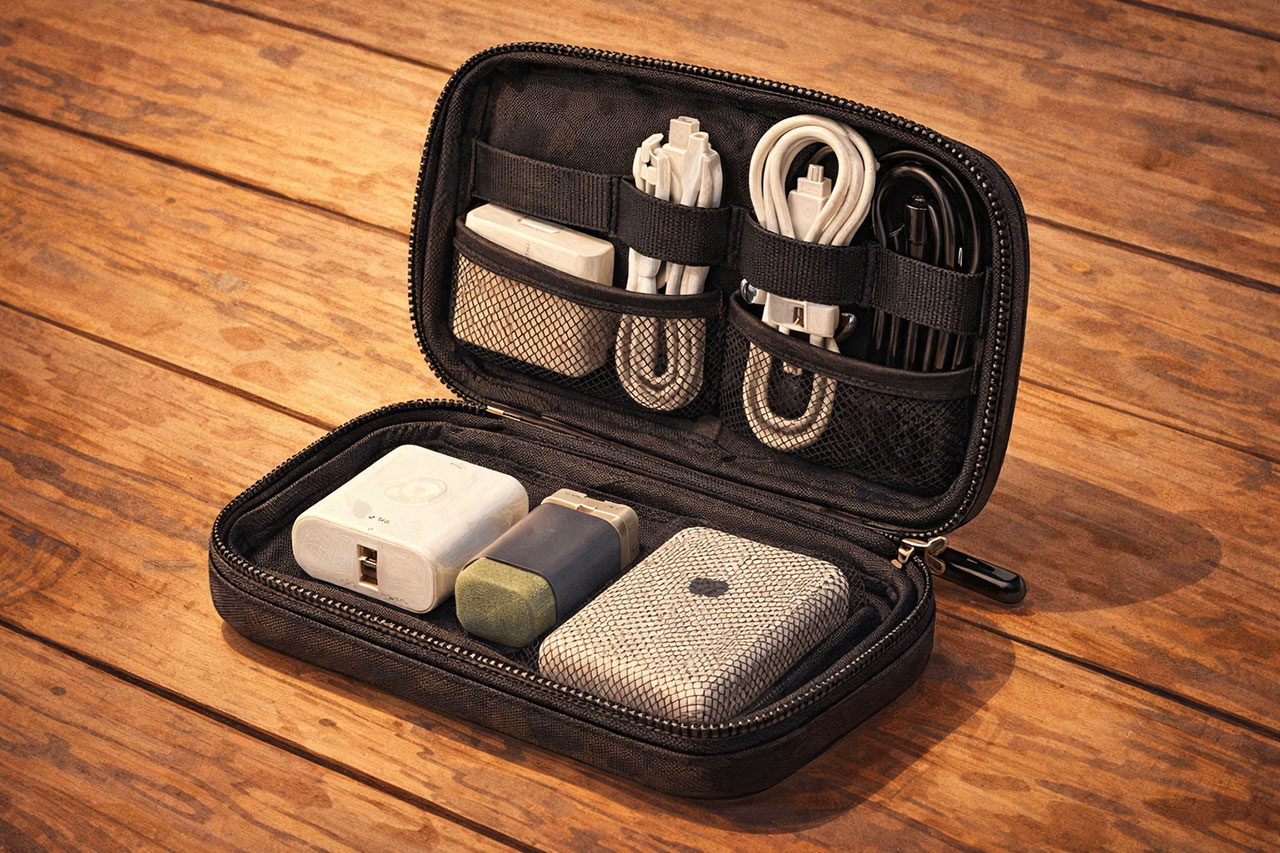
TECH KIT

Best Minimal Tech Kits

Build a cleaner, smaller tech kit with the cords, chargers, and backup items you actually need on the road.

Read More

FAQs About Packing for Different Trip Types

The best way to pack is to start with the type of trip, not a generic packing list. Think about the climate, how often you are moving, what you will actually do each day, and whether you can do laundry. A city-hopping Europe trip and a beach trip need totally different setups.

For most one-week trips, a small capsule wardrobe is enough. The 5-4-3-2-1 method is a good starting point: five tops, four bottoms, three pairs of shoes, two layers, and one accessory set. You can adjust from there based on weather and the formality of your trip.

It depends on the trip. A backpack is usually better for city hopping, stairs, trains, and rough streets. A small carry-on roller can work well for easier airport-to-hotel trips. If you are moving often, choose the bag that is easiest to carry when things get annoying.

At minimum, bring your passport, payment cards, phone, charger, adapter, essential medication, a light layer, comfortable shoes, and offline copies of important travel details. From there, your list should change based on climate, trip length, and how often you are moving.


10 Quick Travel Safety Tips That Actually Matter

Confident traveler with crossbody bag walking through a busy crosswalk in Rome while staying aware of surroundings

10 Travel Safety Tips That Actually Matter

Confident traveler with crossbody bag walking through a busy crosswalk in Rome while staying aware of surroundings

Staying aware in busy transition points like crosswalks and transit hubs is one of the simplest and most effective travel safety habits.


Home » Travel Planning

If you do not want to read a full safety guide, start here.

This is the short version. The habits that prevent 90% of travel problems, without turning your trip into a stress exercise.

The #1 Travel Safety Tip
Stay aware of your surroundings. Most travel problems happen when you are distracted, rushed, or not paying attention.

1. Stay Aware (This Is the Big One)

Look up. Not at your phone. Not with headphones in. Most petty theft happens when you are distracted in crowds, transit stations, or busy streets.


2. Know Where You’re Going Before You Leave

Standing on a sidewalk checking your phone makes you look like a target. Know your route before you step outside.


3. Trust Your Gut Early

If something feels off, it probably is. You do not need to explain it. Create distance and move on.


4. Do Not Carry Everything

Never go out with all your cash, cards, and passport. If something gets stolen, you want it to be annoying, not trip-ending.


5. Use the “Friction” Rule

Make your stuff harder to steal. Zipper pockets, bags in front, split cash. Thieves want easy, not effort.


6. Avoid Flashy Signals

Expensive watches, jewelry, or pulling out a stack of cash makes you visible. Low profile is safer.


7. Verify Every Ride

Check the license plate and driver before getting in. If anything feels off, cancel and move on.


8. Slow Down When Things Feel Urgent

Scammers use urgency. If someone is rushing you, pause. Step aside. Reset the situation.


9. Protect Your “Big Three”

Your phone, wallet, and passport are your trip. Keep track of them constantly, especially in crowds and transit zones.


10. Have a Simple Backup Plan

Offline hotel address. Backup card. Copies of documents. These solve problems fast when things go sideways.

Want the Full System?

This is the quick version. If you want the full breakdown for before you go, on the ground, scams, tech, and what to do when things go wrong:

→ Read the complete Travel Safety Guide


Travel Safety FAQs

Should I carry my passport while sightseeing?

Usually no. Keep your passport secured at your hotel unless local laws require you to carry it. Bring a photo or paper copy and one backup form of ID instead.

What is the most important travel safety tip?

Stay aware of your surroundings. Most travel problems happen when you are distracted, rushed, or unsure where you are going.

How do I avoid looking like an easy target while traveling?

Know your route before you leave, keep your phone and wallet secure, avoid flashing cash or jewelry, and step aside if you need to check directions.

Read More Travel Planning Guides

Plan smarter, pack lighter, stay safer, and avoid the common mistakes that make travel harder than it needs to be.

START HERE

Plan Your Trip

A simple, step-by-step playbook for building a better trip from the first idea to final bookings.

Read More

FIRST TIME ABROAD

First International Trip Guide

A practical starting point for passports, flights, money, and landing abroad with less stress.

Read More

STAYING SAFE

Travel Safety Guide

The full breakdown of safety habits, scams, and real-world situations so you can travel with confidence.

Read More

PACKING & GEAR

Packing & Gear Guide

What to pack, what to skip, and how to build a lighter setup that actually works on real trips.

Read More

BUDGET & COSTS

Travel Budget Guide

Plan real costs, avoid common money mistakes, and stay in control of your budget before and during your trip.

Read More

TRAVEL STYLE

Travel Lifestyle

Explore different ways to travel, from long-term trips and nomad life to retirement and slower travel.

Read More

Carry-On Packing Guide: What to Pack & How to Pack Light

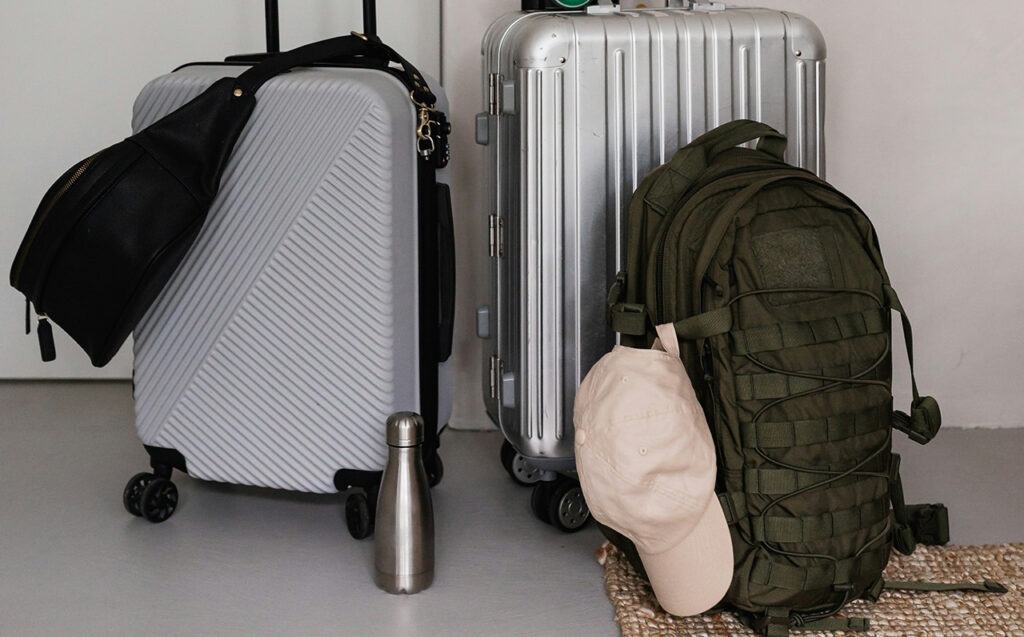
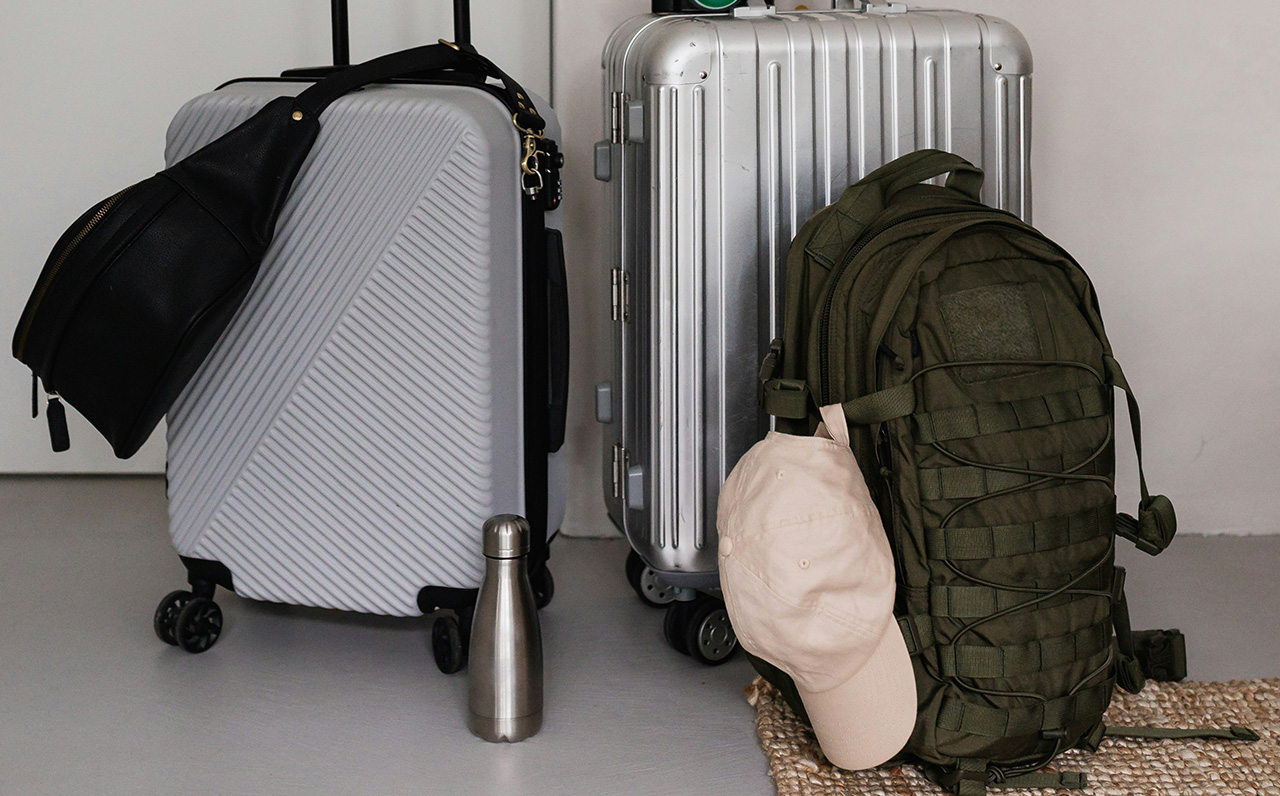
An overhead shot of two pieces of luggage resting against a wall: a silver hard-shell roller suitcase and a dark olive green travel backpack with a tan baseball cap hanging from the strap. Both bags are compact, illustrating a streamlined two-bag travel setup.
Home » Travel Planning

Last updated: March 2026 by Corey Gasman

From the Editor:

It has been 20 years since my round-the-world trip where I lived out of a backpack for a full year, and I have not checked a bag since. Melissa and I do not even own checked luggage anymore.

That works because we use a simple packing list, repeat outfits on purpose, and stop packing for every possible “what if.” Whether we are heading to the cabin for a weekend, taking a one-week beach trip, or traveling abroad for a month, the goal is the same: bring what we actually use and leave the rest behind.

This guide walks through exactly what to pack, what to skip, and how to fit it into a carry-on without feeling like you are sacrificing anything once you arrive.

A quick thought on why checklists matter:

The main clothes are usually easy. What people forget are the small, trip-specific items that make travel smoother, like towel clips for a beach trip, earplugs for a noisy hotel, or the charger that only works with one device.

Use a master list, check things off as they actually go into the bag, and your trip starts with a lot less scrambling.

TLGA Rule: Never pack for “what ifs.” Pack for the trip you are actually taking, and trust that you can buy basic forgotten items at your destination.

Want the exact checklist?

Use the same packing checklist we rely on for every trip. Download PDF.

Packing Checklist
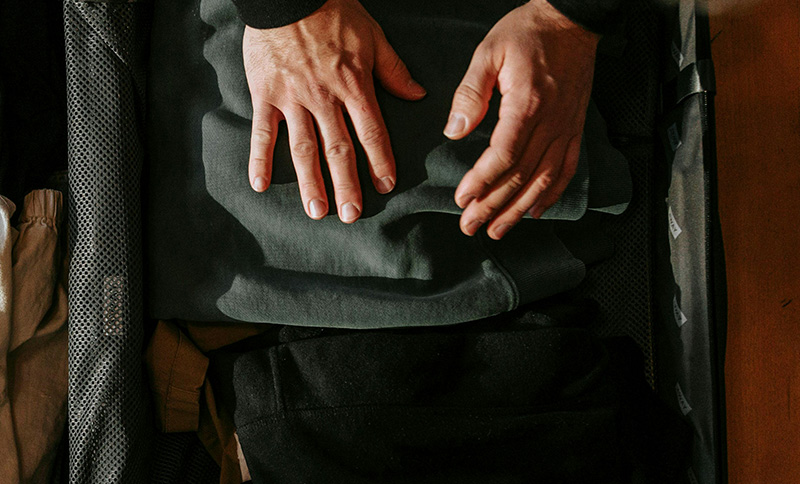
A close-up of a traveler's hands as they carefully pack a dark green garment into a sleek black suitcase, emphasizing a organized and intentional approach to packing light.

A reliable master packing list prevents the panic of forgetting essential items and keeps you from throwing random clothing into your bag at the last minute.


The Baseline Rules of Packing Light

Overpacking is the single biggest reason travel days feel like a chore. Most travelers pack twice what they actually need, resulting in heavy bags, gate-check fees, and unnecessary stress. When you stare at an empty suitcase, it is incredibly easy to panic and start throwing in items you might need. This guide cuts through the noise. It is a straightforward look at what to actually put in your bag for a standard trip so you stay comfortable, mobile, and organized.

  • Mix and match everything: Build a core wardrobe where every top works with every bottom.
  • Stick to the two-bag limit: Bring one main carry-on for the overhead bin, and one personal item for your transit essentials.
  • Pack layers, not outfits: You will need to adapt to temperature changes, so bring pieces you can easily add or remove instead of bulky, single-use outfits.
  • Always use a checklist: It is the only way to guarantee you remember the small, highly specific things you actually need.
  • Drop the “what if” items: Pack for the daily reality of your trip. If an unexpected emergency happens, you can almost always buy what you need locally.

The Master Packing List (Copy This)

This is my baseline list for a standard one-week trip. It fits comfortably in a standard carry-on and covers the vast majority of travel scenarios. Use this as your foundation and adjust slightly based on your specific destination.

Category Items to Pack
Clothing 5 t-shirts, 2 pairs of bottoms, 1 mid-layer, 1 outer jacket, 7 pairs of underwear, 5 pairs of socks, 1 swimsuit.
Toiletries Toothbrush, travel toothpaste, solid deodorant, travel sunscreen, basic medications, lip balm.
Tech Smartphone, multi-port wall charger, power bank, universal adapter, charging cables, headphones.
Essentials Passport/ID, wallet, physical backup of bookings, sunglasses, reusable water bottle.
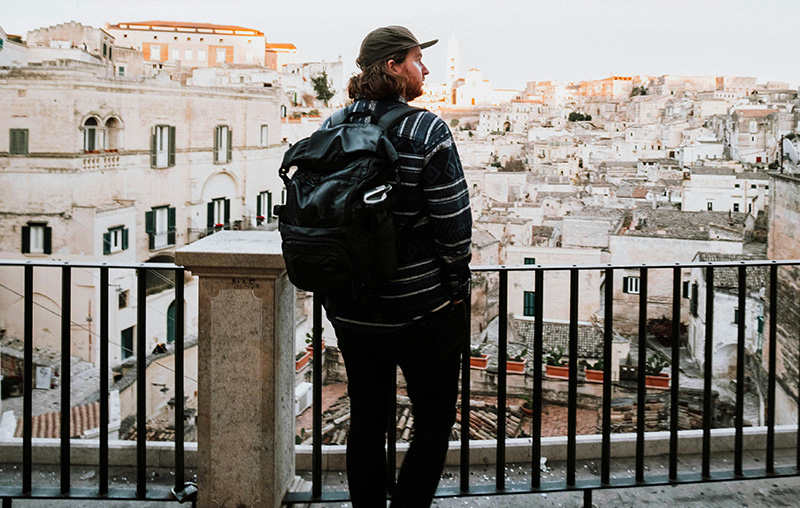
A traveler stands with their back to the camera, looking out over a historic European cityscape under a bright sky. They are wearing a black and white striped shirt and a large black travel backpack. They are leaning against a black metal railing that overlooks terracotta rooftops and a large dome in the distance.

A solid travel wardrobe relies on a few core pieces that mix well together rather than a totally different outfit for every day of the trip.


The “New Outfit Every Day” Myth

The fastest way to overpack is believing you need a fresh, distinct outfit for every single day of your trip. You have to break that habit. If you are going on a seven-day vacation, you absolutely do not need seven different bottoms.

A much smarter approach is building a travel capsule wardrobe. By focusing on how your items work together, you unlock more outfit combinations with far less clothing in your suitcase.

How to build the core wardrobe

  • Stick to a neutral palette: Choose colors that allow every top to work seamlessly with every bottom you pack.
  • Prioritize performance fabrics: Merino wool or high-quality synthetics resist wrinkles and can be worn multiple times without retaining odor.
  • Ditch single-use items: If a shirt only matches one specific pair of pants, it does not belong in your carry-on.
  • Plan on sink washing: If you are traveling for more than ten days, plan to do a quick load of laundry at your Airbnb or in the hotel sink rather than bringing two weeks worth of clothes.

Local Guide Tip: I usually pack just two pairs of shorts and five t-shirts for an entire week. By sticking to neutral colors and doing a quick load of laundry if needed, you never feel like you are wearing the exact same thing twice.

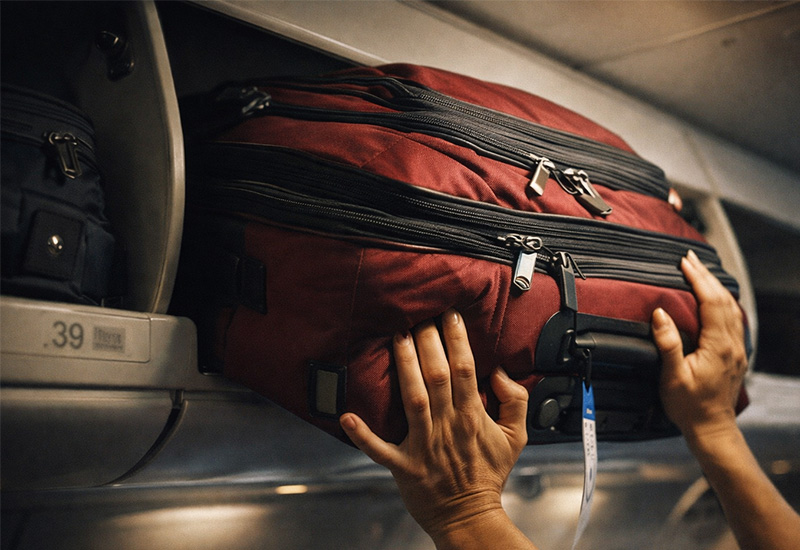
Overstuffed carry-on suitcase stuck in airplane overhead bin with traveler pushing to close it

The benefits of traveling with only a carry-on disappear immediately if your bag is so overstuffed that it has to be gate-checked anyway.


The Carry-On “Eye Test”

The entire point of traveling carry-on-only is speed. It gets you in and out of airports faster, makes jumping into an Uber effortless, and turns hotel check-ins into a breeze. But all those advantages vanish if you cheat the luggage limits by overpacking.

A common mistake is using a soft-sided carry-on, unzipping the expander, and stuffing it until it looks like a boulder. If your bag does not pass the eye test, it is not going to fit smoothly into the overhead bin, and it certainly will not fit in the airport sizer. When that happens, you end up wrestling with your luggage in the aisle or being forced to check it at the gate.

Be realistic about what fits naturally inside the bag’s footprint. If you have to sit on your suitcase to zip it, you need to size down your packing list, not force the zippers.

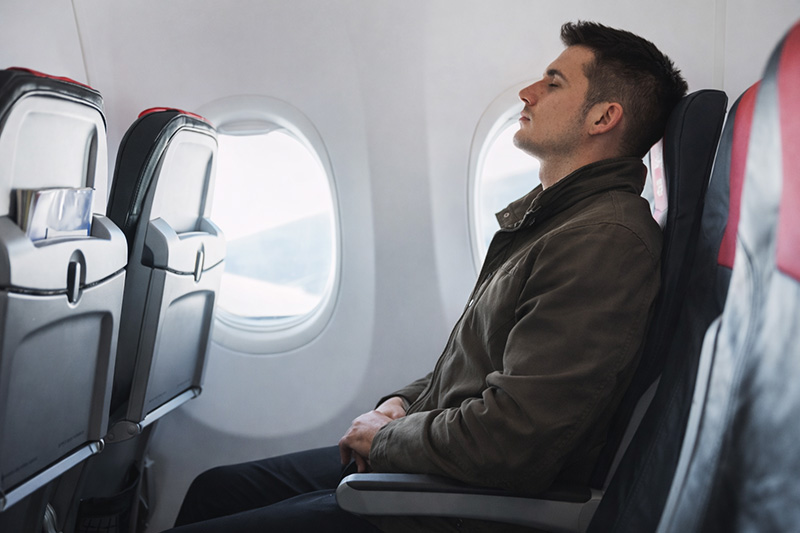
Man sitting on airplane wearing a fall jacket to save luggage space while traveling

Wearing your bulkiest layers on the flight saves massive amounts of space in your luggage and keeps you prepared for drastic temperature changes.


Check the Weather & Pack for Layers

Instead of guessing what the weather might do, check the forecast for your destination about a week before you leave, and adjust your wardrobe accordingly. If the forecast shifts, you adapt your layers, not your entire suitcase.

Most people pack for comfort in a single moment instead of thinking about the full trip. That is how bulky items sneak into your bag. A better approach is building an essential layering kit. You get more flexibility, more temperature control, and far less bulk in your luggage.

The Essential Layering Kit

  • Base Layer: A breathable t-shirt or long-sleeve.
  • Mid-Layer: A lightweight fleece or thin merino sweater.
  • Outer Shell: A windbreaker or packable puffer that compresses down small.

If you are flying out of a cold climate to a destination that is 80 degrees, do not pack your jacket and long sleeves inside your carry-on. Airports and airplane cabins are notoriously cold anyway. Wear your jacket and long sleeves onto the flight, take them off if you get warm, and simply carry them when you step off the plane into the heat. This simple habit keeps your luggage light and leaves room for the things you actually need to pack.

Pro Tip: I always wear my primary walking shoes, my heaviest pants, and my outer jacket on the plane. It is the easiest way to travel with a smaller bag without sacrificing the layers you might need for cool evenings.

A traveler seen from behind, wearing a striped shirt and a large black travel backpack, overlooking a historic European city with terracotta roofs and a prominent dome under a bright sky.

Traveling with just one main bag forces you to prioritize mobility over having endless outfit choices.


Why One-Bag Travel Changes Everything

There is a massive psychological difference between dragging a heavy suitcase behind you and walking onto a plane with just a well-packed travel backpack. One-bag travel is not a restriction; it is freedom.

When you commit to a single carry-on, you eliminate the anxiety of lost luggage. You skip the baggage claim carousel entirely. You can navigate cobblestone streets, jump on crowded trains, and walk up narrow hotel stairs without breaking a sweat. It forces you to pack only what you truly need, which almost always results in a better travel experience.

In the real world, “one-bag travel” actually means a main carry-on for the overhead bin, paired with a small personal item for under the seat.

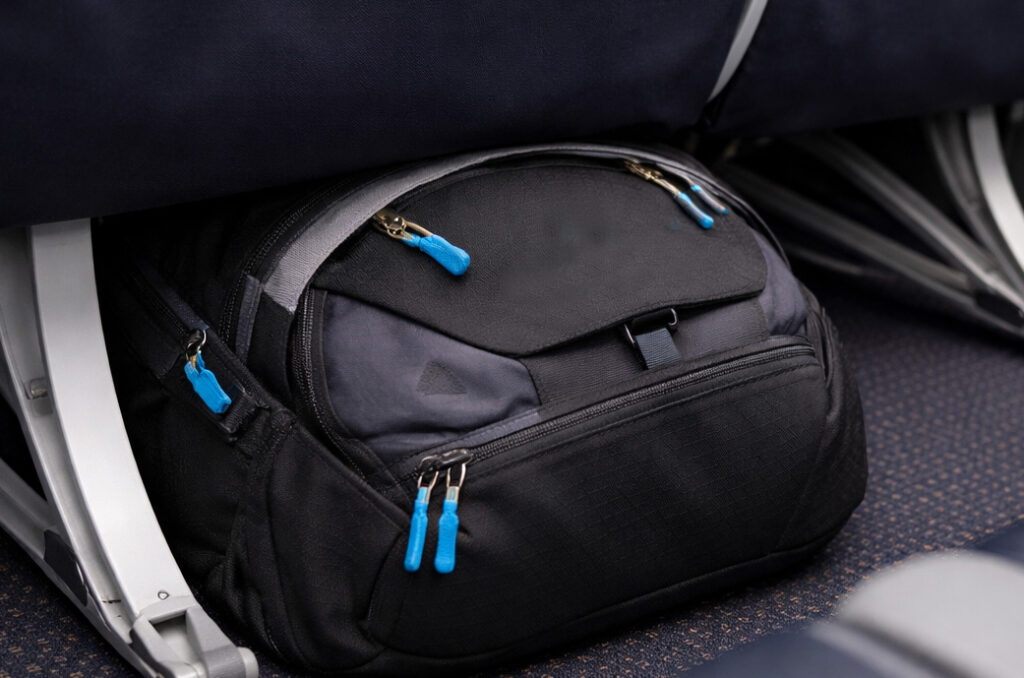
Travel backpack stored under airplane seat with top accessible and fitting neatly as a personal item

A smart carry-on routine relies on a strict divide between your main overhead luggage and your under-seat personal item. A properly sized personal item should slide under the seat and stay easily accessible mid-flight.


The “1.5 Bag” Setup

To really make carry-on travel work smoothly, you need a strict boundary between your two bags. It is not just about making things fit. It is about accessibility. You have your main overhead bag, which is usually a roller or a larger travel backpack, and your smaller personal item, like a day pack or tote bag.

Your main bag holds your destination items. Your personal item is your transit survival kit. You never want to be the person blocking the boarding line because your headphones and book are buried under a pile of shirts in your overhead roller.

The Bag Where It Goes What Goes Inside
Main Carry-On Overhead bin Clothing, shoes, toiletry bag, and anything you do not need until you reach the hotel.
Personal Item Under the seat Laptop, headphones, chargers, book, snacks, medications, passport, and wallet.
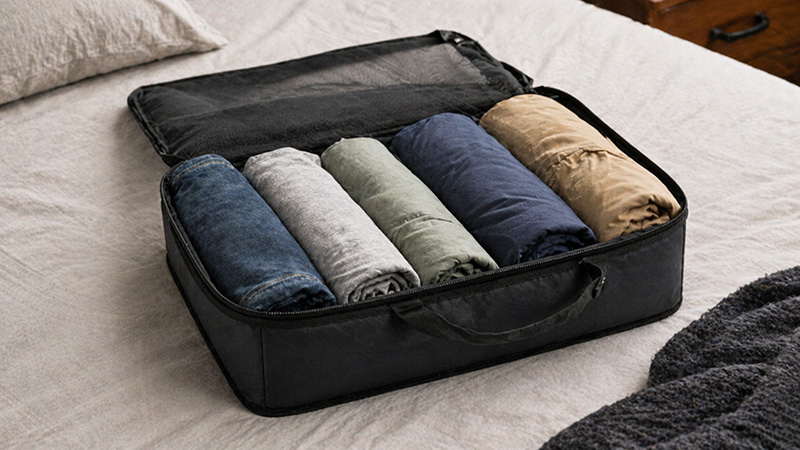
A high-angle, close-up shot of a black compression packing cube filled with neatly rolled clothing in shades of grey, navy, and olive green, demonstrating an efficient and organized way to maximize luggage space.

Packing well is not just about bringing less. It is about using the space you have in a smarter way. Rolling your clothes and using compression cubes helps you fit more while keeping everything organized and easy to find.


How to Actually Pack the Bag

When it comes down to physically putting things in your carry-on, you need a strategy. Throwing clothes in randomly wastes up to a third of your usable space. The goal is to build a solid foundation, fill the awkward gaps, and use compression to your advantage.

If you are using a wheeled carry-on, start by filling the grooves between the handle tubes at the bottom of the bag. Roll small items like swimsuits or extra socks and lay them in those channels to create a flat base. Next, place your heaviest items closest to the wheels so the bag does not tip over when you stand it up.

This is where packing cubes change the game. I use a couple of compression cubes to seriously maximize space. I will roll up all of my t-shirts tightly and pack them into one compression cube, and then roll all of my underwear and socks into another. Rolling prevents deep wrinkles and fits perfectly into cubes, while the compression zipper squeezes the excess air out, shrinking your clothes down to half their size.

The standard carry-on packing order

  • Bottom layer: Small rolled items between the handle grooves to create a flat surface.
  • Heavy layer: Your packed secondary shoes placed heel-to-toe near the wheels. Always stuff the insides of your shoes with chargers, socks, or small items.
  • Core layer: Compression packing cubes filled with your rolled t-shirts, pants, and socks.
  • Top layer: Folded bulky items like sweaters or jackets that do not roll well, plus your flat toiletry bag.

Pro Tip: Compression cubes are incredible for space, but they do not reduce weight. If you are flying an international airline with a strict carry-on weight limit, be careful not to pack your bag so dense that you trigger a heavy bag fee at the gate.

Want the exact setup I use?

See the specific cubes, organizers, and bags that make packing light easy in my Essential Travel Gear breakdown.

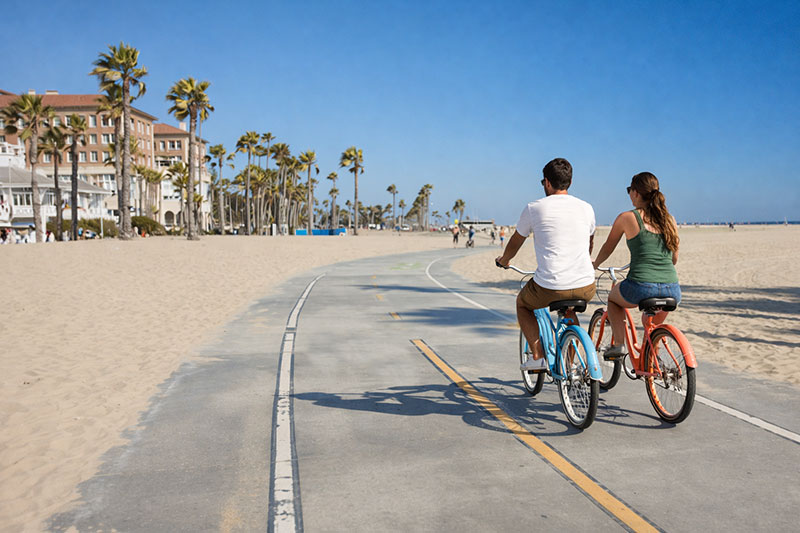
Couple riding cruiser bikes along the Marvin Braude Bike Trail on the Strand in Los Angeles with palm trees, beach, and ocean on a sunny day

Your destination dictates the specific gear you swap into your core packing list.


Adjusting Your Packing for Different Trips

The master list covers the basics, but you need to tweak your gear based on where you are going. You do not need a completely different strategy, just smart substitutions.

  • Beach Trips: Swap heavy pants for lighter linen. Add a dry bag for boat days, coral-safe sunscreen, and towel clips to secure your spot by the pool.
  • Cold Weather Trips: Focus entirely on layering. Swap basic t-shirts for Merino wool base layers, and always wear your heaviest boots and coat on the flight.
  • City Travel: Prioritize a capsule wardrobe. Bring one versatile “nice” outfit for dinners and invest in a high-quality, supportive pair of walking shoes that do not look like running sneakers.
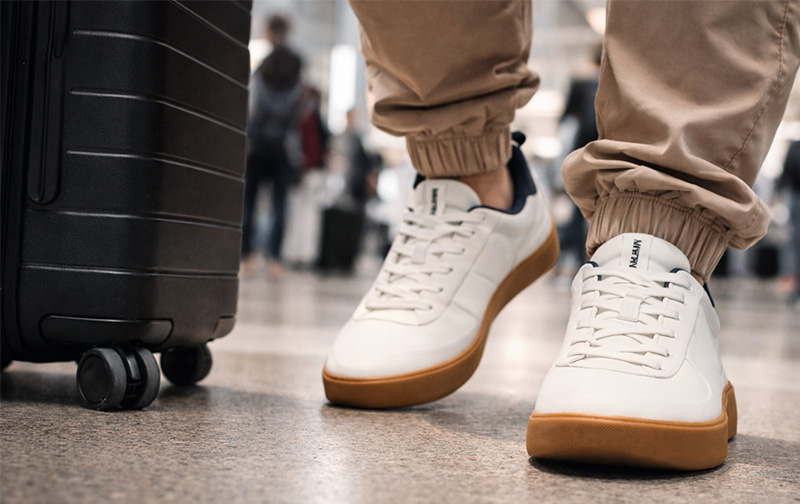
Traveler walking through airport wearing white sneakers with gum soles and pulling a roller suitcase

Shoes take up more room than anything else in your luggage. Limiting yourself to two functional pairs is the fastest way to lighten your load.


The Two-Shoe Rule

Shoes are the biggest space killers in any packing setup. You rarely need more than two pairs for a standard trip. The secret is finding one primary shoe that can handle heavy walking days without looking entirely out of place in a nice restaurant.

Your second pair should be lightweight and pack flat. This gives your feet a break from your primary shoes and provides a casual option for moving around your hotel or heading to a nearby cafe.

Local Guide Tip: Never pack brand-new shoes for a trip. Always break them in for at least a week at home first. Blisters will ruin a travel itinerary faster than bad weather.

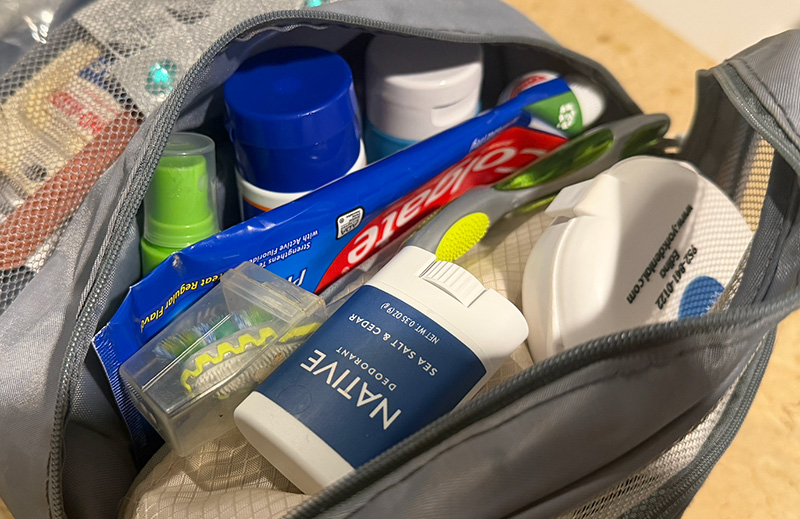
A high-angle, close-up shot of a small, clear plastic toiletry bag packed with travel-sized essentials. Inside the bag, a tube of Colgate toothpaste, a white Native deodorant stick, a small blue bottle, and other miscellaneous hygiene items are visible. The bag sits on a clean, white surface, illustrating a compact and organized approach to packing toiletries.

Bring just enough personal care items to get through your first few days. You can easily purchase full-size replacements at your destination if needed.


Minimalist Toiletries

Toiletries are incredibly easy to overpack. The reality is that pharmacies exist all over the world. You do not need to bring a massive bottle of shampoo or a two-month supply of body wash for a ten-day vacation.

Pack a small clear bag with just the essentials. Bring solid versions of products like soap or deodorant when possible since they do not count against your airport liquid limits and they will never leak in your bag.

The toiletry checklist

  • Toothbrush and travel-sized toothpaste
  • Deodorant (solid stick preferred)
  • Basic medications (pain relievers and any daily prescriptions)
  • Travel-sized sunscreen
  • Minimal grooming or makeup kit
  • Lip balm

TLGA Rule: If you are flying, liquids are strictly regulated. Always follow the TSA 3-1-1 liquids rule so you do not have expensive items thrown away at the security checkpoint.

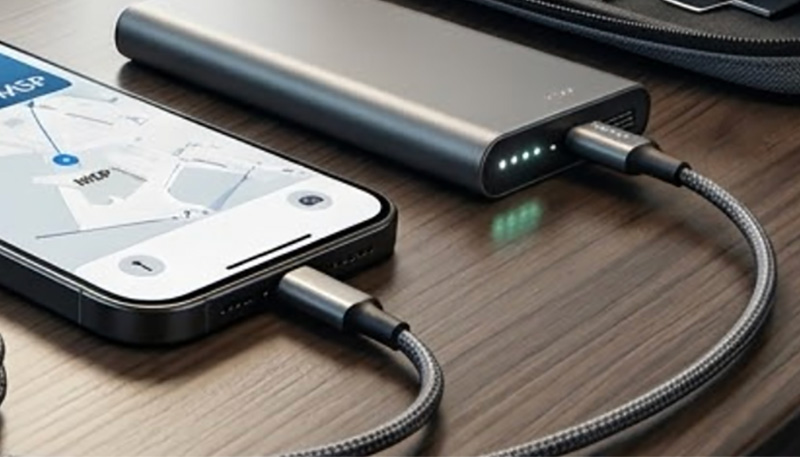
A close-up editorial photograph of a organized travel tech setup on an airport table, including a multi-port wall charger with braided cables plugged into an outlet, a smartphone displaying an MSP airport map, and a power bank.

A streamlined tech kit prevents cables from tangling in your bag and ensures your devices stay powered during long transit days.


Essential Travel Tech

Keep your electronics extremely simple. Unless you are traveling for work, you do not need a laptop, a tablet, an e-reader, and a secondary camera. A smartphone can handle navigation, photography, and entertainment for most modern travelers.

The most important part of your tech kit is how you power it. A dead phone in a new city creates instant stress. Focus on packing reliable chargers and using travel tech organizers to keep cables tidy, rather than packing extra devices. A good multi-port wall charger, a universal adapter if traveling internationally, and a reliable power bank are the only three things most people truly need.

That bulky sweatshirt feels like a travel essential, but it is usually the first thing to take over your carry-on.


Common Packing Mistakes That Ruin Trips

Even experienced travelers fall into bad habits. These are the mistakes that quietly lead to overstuffed bags and stressful travel days.

  • Packing for fantasy scenarios: You are not going to suddenly start running every morning on vacation if you do not run at home. Leave the extra workout gear behind.
  • Ignoring airline size rules: Budget airlines have extremely strict personal item limits. Do not assume your bag will pass. Always check the exact dimensions before you head to the airport.
  • Not testing your packed bag: Pack your bag fully two days before you leave and carry it around for ten minutes. If it already feels heavy, it will feel worse on travel day.
A woman wearing a brown backpack and olive green pants walks confidently across a rocky, sunlit desert landscape. She is captured mid-stride, highlighting a sense of movement and adventure against the rugged terrain.

Pack for the environment you are actually visiting to ensure you stay mobile and comfortable during outdoor adventures.


The “Do Not Pack” List

A smart packing list is defined just as much by what you leave out. Many travelers ruin their mobility by packing for highly unlikely scenarios. Trust that you are traveling to a place where people live normal lives. If an unexpected event happens, you can almost certainly buy a cheap umbrella, a fresh t-shirt, or a bottle of aloe vera locally.

Leave these behind

  • “Just in case” outfits: If you do not wear it at home, you will not wear it on the road.
  • Multiple heavy jackets: Layering lighter pieces is far more efficient than packing thick coats.
  • Hair dryers: Almost every hotel and most rental apartments provide them.
  • Books you probably will not read: Bring one physical book at most or switch to digital.
  • Excessive camera gear: Modern phones take excellent photos for 95 percent of travelers.

Frequently Asked Questions

What should I pack for a 7-day trip with a carry-on?

For a standard 7-day trip, pack 5 t-shirts, 2 pairs of bottoms, 1 mid-layer, 7 pairs of underwear, and 5 pairs of socks. Stick to neutral colors so you can mix and match outfits, and use packing cubes to maximize space.

The only foolproof method is to use a master packing list and check items off as they actually go into your suitcase. Do not rely on your memory while throwing things into a bag the night before.

If your carry-on does not pass the “eye test” or fit into the airline sizer at the gate, the gate agent will force you to check it. You will usually have to pay a checked bag fee on the spot, and you will have to wait at baggage claim when you land.

For almost every trip, yes. It makes moving days easier, cuts down on baggage claim time, eliminates the risk of lost luggage, and naturally forces you to pack only the clothing you will actually wear.

Usually two pairs is enough for most trips: one primary walking shoe that you wear on the plane, and one lighter secondary option packed flat in your bag. More than that adds bulk incredibly fast.

Your personal item (the bag under the seat in front of you) should hold your transit essentials. This includes your passport, wallet, medications, phone, power bank, headphones, and a light snack. Never put these in your overhead roller.

Explore More Packing & Gear Guides

The luggage, tech, and clothing strategies that actually hold up on the road.

GEAR GUIDE

Essential Travel Gear

The core items that actually earn their spot in your bag for real travel days.

Read More

LUGGAGE

Best One-Bag Backpacks

Carry-on backpacks that work in the real world, not just in product photos.

Read More

CLOTHING

Travel Capsule Wardrobe

How to pack clothes that mix well, rewear well, and save space.

Read More

ORGANIZATION

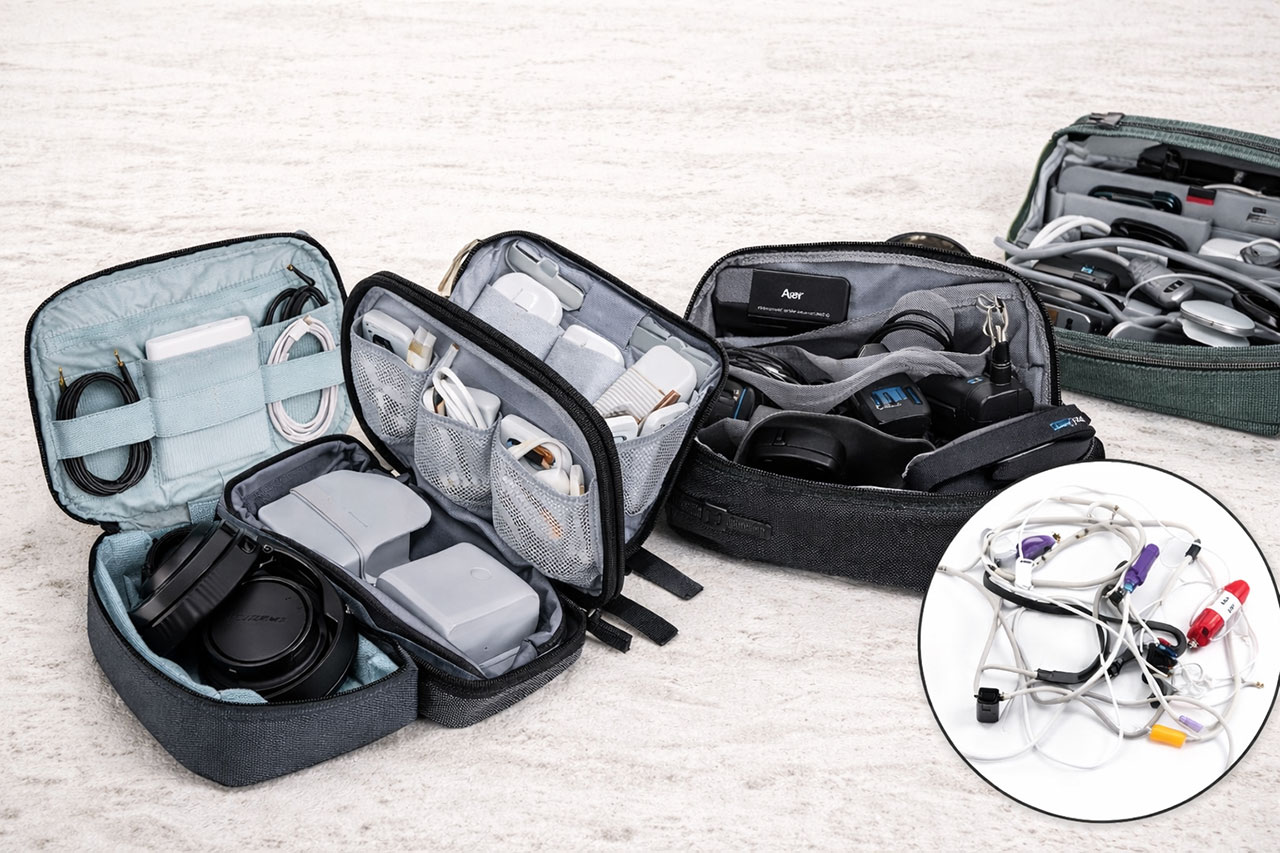
Travel Tech Organizers

Keep cables, chargers, and adapters from turning into a tangled mess.

Read More

POWER

Best Travel Chargers

The wall blocks and power banks that make long transit days easier.

Read More

GEAR GUIDE

Small Travel Items

The low-profile gear that quietly makes the biggest difference.

Read More

Travel Lifestyle

A woman smiles at a waterfront restaurant table in Montenegro, with a breakfast of coffee and croissants set against a backdrop of historic stone buildings and mountains.

Slower travel often means carrying less, changing bases less often, and making room for a more comfortable and sustainable pace on the road. Melissa and I enjoyed a relaxed breakfast here in Perast, located on the Bay of Kotor in Montenegro.


Home » Travel Planning

Last updated: March 2026 by Corey Gasman

From the Editor:

Most travel content focuses on where to go, what to pack, or how to save money on flights. That matters, but it misses the bigger question. What kind of traveler are you actually becoming?

I started my web design company back in 2009. That gave me the flexibility to work from anywhere, long before remote work was the norm. Whether I am opening my MacBook Air in a Cartagena cafe to run Photoshop or taking a Zoom call from Mazatlan, I have learned that a weekend city break requires a completely different approach than a month-long working trip.

This page is here to help you figure out the lifestyle side of travel so the rest of your planning makes sense. Because when your travel style matches your life stage, your energy, and your goals, the whole experience gets better. You waste less time forcing the wrong itinerary and start building trips that feel natural.

Need the practical side too?

Pair this guide with Planning Your Trip and the Travel Safety Guide.

TLGA Rule: Do not copy someone else’s travel style just because it looks good online. The best trips are the ones that fit your real pace, budget, responsibilities, and comfort level.

Start Here: Travel Is Not One-Size-Fits-All

Some people want a few great trips a year. Some want a month in Europe with one apartment and a slower pace. Some are working remotely and trying to balance Wi-Fi, cost of living, and quality of life. Others are entering retirement and finally have the freedom to travel in a more meaningful way.

Those are not small differences. They change where you stay, how much you move around, what you pack, how you budget, and what you need to feel comfortable abroad. That is why travel lifestyle matters. It gives structure to everything else.

Why this matters before you book anything

Question Why It Matters
How long are you really traveling? A five-day trip and a two-month stay need completely different planning and packing decisions.
How much movement do you enjoy? Some travelers thrive on fast-moving itineraries. Others enjoy travel much more when they slow down and stay put longer.
Are you working, exploring, or relocating? Your purpose shapes your housing, budget, routines, and expectations.
What level of comfort do you want? Travel style is not just about adventure. It is also about energy, convenience, and what feels sustainable for your life stage.
A couple sits at a sunny rooftop table with drinks, overlooking the coastal malecon and beaches of Mazatlán.

Escaping the Minnesota winters with Melissa, testing out locations like Mazatlán as a potential retirement base.


The Main Types of Travel Lifestyles

Most travelers fit into more than one category over time. You might start with shorter trips, move into solo travel, then later experiment with longer stays or retirement travel. These are not rigid labels. They are helpful ways to think about what kind of travel actually fits you right now.

Travel Lifestyle Best Fit For What Defines It
Short-trip travelers People taking a few focused trips each year Tighter itineraries, higher efficiency, and stronger emphasis on planning well.
Digital nomads Remote workers with location flexibility Work infrastructure, longer stays, cost-of-living tradeoffs, and balancing routine with exploration.
Solo travelers Independent travelers who want freedom and flexibility More autonomy, more self-direction, and greater importance around confidence and safety.
Slow travelers People who prefer depth over speed Longer stays, fewer bases, less burnout, and more neighborhood-level travel.
Retirement and empty nesters Travelers with more flexibility in time and schedule Comfort, extended travel, seasonal living, and sometimes testing out relocation abroad.
Local Guide Tip: You do not need to force yourself into one identity. A traveler can be solo on one trip, slow-travel on the next, and retirement-focused later. The point is choosing the right style for the season you are in.
A young woman works on her laptop while holding a coffee mug at a lush, open-air cafe.

Digital nomad life works best when you stop treating it like full-time vacation and focus on finding a livable rhythm.


Digital Nomad Life: Freedom With Structure

Since starting my business in 2009, I have had the ultimate flexibility to work anywhere in the world. Every time I travel, my MacBook Air comes with me so I can run my design programs and take video meetings. Remote work has opened up a version of travel that did not feel realistic for many people even a few years ago.

For my wife Melissa and me, a typical nomad trip means spending a month in a place like Cartagena, Colombia, or Mazatlan, Mexico. We usually work a solid three weeks, focusing on good Wi-Fi speeds and a steady routine, and then piggyback a true one-week vacation at the end. It is a hybrid model that keeps the business running while letting us actually experience the destination.

What digital nomads usually care about most

What digital nomads usually care about most

  • Cost of living compared with quality of life
  • Reliable Wi-Fi and work-friendly cafes or apartments
  • Visa flexibility and length of stay options (you can compare options using tools like Nomad List)
  • Safety, neighborhood walkability, and good daily rhythm
Pro Tip: For remote workers, the best destination is rarely the one with the flashiest social content. It is the one where your workday feels manageable and the off-hours still feel worth it.

Start with these next: The Top 20 Digital Nomad Countries Right Now, Digital Travel Security, and Hotels vs Airbnb vs Long Stays.

A solo female traveler wearing a bright pink jacket stands in a green field, looking up at a towering, powerful waterfall.

Solo travel changes the way many people experience the world, often creating more flexibility, more independence, and more confidence than they expected.


Solo Travel: Independence, Confidence, and Going on Your Own

Traveling solo gives you the ultimate freedom to move around and do exactly what you want. I spent a month traveling around New Zealand on the Kiwi Experience bus, a week navigating Tokyo by myself, and another week exploring the North Shore of Oahu. If you want to spend hours in a museum, go on a long hike, or just enjoy a very slow lunch, you do not have to compromise.

The tradeoff is that it can get lonely if you are not actively meeting locals or other travelers to fill your day. However, because you are on your own, you are often much more approachable. You tend to engage more deeply with the people around you than you would if you were focused on a travel partner.

What matters more when traveling solo

  • Choosing the right neighborhood
  • Booking your first few nights carefully
  • Keeping arrival days simple
  • Having a stronger safety routine for devices, documents, and transportation
Local Guide Tip: Solo travel does not have to mean risky travel. In many cases, it simply means being more intentional with your daily routines and personal safety.

Good next reads: Solo Female Nomad Safety Guide for 2026, Travel Safety Guide, and The Practical Travel Safety Cheat Sheet.

A man and woman standing on a grassy hilltop with backpacks, looking out at a scenic coastal view with blue water and distant cliffs under a clear sky.

Slower travel often means carrying less, changing bases less often, and making room for a more comfortable and sustainable pace on the road.


Slow Travel and Long Stays: Less Rushing, More Depth

One of the best upgrades many travelers can make is simply slowing down. Instead of trying to cover multiple cities in a blur, slow travel focuses on fewer bases, longer stays, and more time to settle into the actual rhythm of a place.

This often leads to better trips. You spend less time in transit, waste less energy packing and unpacking, and usually make better food, neighborhood, and housing decisions because you are not constantly moving. It also tends to be more realistic for longer trips and anyone who does not want every day to feel like a checklist.

Why people end up loving slower travel

  • Less burnout from transit and constant logistics
  • More flexible housing choices and often better value
  • Time to develop daily routines that make travel easier
  • A deeper feel for neighborhoods, culture, and local rhythm
Local Guide Tip: Slower travel is often the sweet spot between a standard vacation and full relocation. It gives you more depth without forcing a bigger life decision before you are ready.

Helpful follow-up guides: Mastering the Carry-On: One-Bag Travel, Getting Around Abroad, and Choosing the Right Fit for Where You Stay.

An older couple sitting at a sunny outdoor cafe table, smiling and talking over drinks with a scenic European coastal town and hillside in the background.

For many empty nesters and retirement-age travelers, the biggest opportunity is rethinking what travel can look like when time opens up.


Travel After Retirement and the Empty Nester Shift

While I am not retired yet, Melissa and I recently spent time in Mazatlan and saw firsthand how the expat and empty nester communities operate. Once work schedules loosen or kids are grown, people realize they are no longer limited to quick trips squeezed between obligations.

These communities build incredible social infrastructures. Mornings are filled with people walking or biking the coastal paths, hitting the pickleball courts, or playing golf, and by Wednesday night, everyone is gathering for bar bingo. Many retirees are also drawn to South America or Thailand because the strong US dollar stretches so much further, allowing for a fantastic quality of life without burning through savings.

Common paths empty nesters explore

Path What It Looks Like
Longer annual trips A few major trips each year with more time in each destination.
Seasonal stays Spending a month or more in one destination to escape weather or deepen the experience.
Retirement scouting Using travel to test whether a place could work for future part-time or full-time living.

Retiring abroad Making a more serious move based on lifestyle, cost, healthcare, and long-term fit.

Best next reads: Travel After Retirement, Retiring Abroad, Best Countries to Retire Abroad in 2026, and Travel Insurance Explained.

Silhouettes of people relaxing on the sand and wading in the water at a quiet beach during a vibrant, golden sunset.

The right travel lifestyle usually comes down to balancing freedom with realism, including comfort, budget, pace, and the amount of complexity you actually want.


How to Choose the Right Travel Style for You

The goal is not to pick the most adventurous lifestyle or the trendiest one. The goal is to choose the version of travel you will actually enjoy enough to keep doing well.

A lot of bad trips come from forcing the wrong style. Trying to move too fast, pack too much into the itinerary, work remotely from a place that does not support your routine, or treat retirement travel like a backpacking challenge are all examples of mismatch. Better travel usually starts with a little honesty.

Ask yourself these before building your next trip

  • Do I want novelty every day, or do I want a steadier rhythm?
  • Am I energized by movement, or drained by it?
  • Do I care more about efficiency, comfort, cost, or depth?
  • Am I traveling to explore, to work, to reset, or to test a bigger life change?
  • Would I rather see more places, or know one place better?
Pro Tip: The best travel lifestyle is the one that still feels good on day six, not just the one that looked exciting when you booked it.

Once you know your style, the rest gets easier. Planning gets cleaner. Packing gets lighter. Safety becomes more practical. You stop trying to copy someone else’s trip and start building one that fits your life.

Frequently Asked Questions

What is a travel lifestyle?

A travel lifestyle is the broader way you choose to travel over time, not just a single trip. It includes your pace, trip length, priorities, comfort level, and whether travel is occasional, seasonal, work-based, solo, or part of a bigger life change.

Travel planning is about logistics like flights, packing, budget, and itineraries. Travel lifestyle is about choosing the kind of travel that fits your life, whether that means solo travel, longer stays, retirement travel, or remote work abroad.

Not always. It depends on the trip and the traveler. Slow travel tends to work better for longer trips, lower stress, and deeper destination experience. Faster itineraries can still work well for shorter vacations or first-time visits.

Absolutely. These categories overlap all the time. A solo traveler can also be a remote worker, a slow traveler, or an empty nester using travel to explore a new phase of life.

There is no single best model, but many retirees and empty nesters enjoy longer trips, slower pacing, seasonal stays, and testing destinations before making bigger relocation decisions.

Explore the paths that shape how you travel, from nomad life to retirement travel, solo trips, and longer stays abroad.

WHY WE TRAVEL

Travel Trends That Actually Matter

A broader look at the shifts changing why and how people travel right now.

Read More

REMOTE LIFE

Top Digital Nomad Countries

Where remote workers can balance livability, value, and a better day-to-day rhythm.

Read More

SOLO TRAVEL

Solo Female Nomad Safety Guide

Practical advice for traveling independently with more awareness and confidence.

Read More

NEW FREEDOM

Travel After Retirement

How to shift from occasional trips to more meaningful long-form travel.

Read More

BIG MOVE

Retiring Abroad Guide

What to think through before turning travel into a more permanent international shift.

Read More

TRAVEL LIGHT

Mastering One-Bag Travel

A lighter, easier way to move through longer trips and more flexible travel seasons.

Read More

Global Emergency Numbers & Safety Rankings

World globe showing international destinations representing global travel safety and emergency reference planning
Home » Travel Planning

Updated regularly • Built for quick screenshots, fast reference, and smarter arrivals

When you land in a new country, you do not need a giant database of risk scores or generic advice. You need the essentials: the local emergency number, the most likely friction point, and a quick reminder of how to stay one step ahead.

This cheat sheet covers twenty of the most popular international destinations for American travelers. The goal is simple: give you the most useful local heads-up fast, so you can stay calm, avoid predictable mistakes, and enjoy the trip.

Most travel issues are predictable. They usually fall into a few patterns: distraction theft, transportation confusion, overcharging, poor situational awareness, or not knowing who to call when something goes sideways.

How to Use This Cheat Sheet

This is not something to memorize. It is something to use.

Before your trip, find your destination in the table, take a quick screenshot, and save the emergency number in your phone. That alone removes a huge amount of friction if something goes wrong.

Once you are on the ground, your goal is simple: stay aware of the common patterns. Most issues travelers run into are predictable.

Quick Defaults That Work Anywhere

  • Download your destination’s offline map before leaving Wi-Fi
  • Save your hotel name, address, and a map pin
  • Screenshot key info instead of relying on signal
  • Know the emergency number before you need it
Download the Quick Version

Want this in a simple format you can save to your phone or print before a trip?

Download the TLGA Safety Card

For the full safety framework, read the complete Travel Safety: A Smarter Guide to Safer Trips. For deeper scam breakdowns, see Travel Scams & Tourist Traps. For device and account protection, read Digital Travel Security.

A person holding a smartphone inside a car, displaying the emergency number 911 in large red digits on the screen.

Knowing the local emergency numbers and common distraction patterns before you land turns stressful moments into solvable ones.


The Global Safety Essentials

These twenty destinations represent some of the most popular international routes for TLGA readers. This is the quick-reference version you can actually use in the real world.

Country What to Watch For Emergency #
Aruba Sun exposure, dehydration, and minor beach theft 911
Bahamas Jet ski rental disputes and resort-area touts 911 or 919
Canada Winter driving hazards and remote cellular gaps 911
Colombia Nightlife drink spiking and street robbery patterns 123
Costa Rica Rental car smash-and-grabs at tourist stops 911
Dominican Republic Resort-area “local” excursion scams 911
France Metro pickpockets and the “found ring” trick 112
Germany Petty theft at major transit stations 112
Greece Menu overcharging in heavy tourist zones 112
Ireland Narrow rural driving and fast-changing weather 112 or 999
Italy Transit pickpockets and “helpful” station guides 112
Jamaica Aggressive vendor touts and unlicensed taxis 119 or 110
Japan Nightlife touts and bar overcharges 110 or 119
Mexico ATM skimming and unlicensed taxis 911
Netherlands Phone snatches and “fake police” tricks 112
Portugal Tourist-zone petty theft and distraction scams 112
Spain Street distraction scams and bag snatching 112
Switzerland High-altitude weather swings and mountain safety 112
Thailand Tuk-tuk misdirection and gem scams 191 or 1669
United Kingdom Moped phone snatches in central areas 999
Local Guide Tip
Always download the offline Google Map of your destination city while you are still on hotel Wi-Fi. Your GPS will still work without service.
Build the Full System

Having the right number is step one. Knowing how to prevent problems before they happen is step two. Read the full guide:
Travel Safety: A Smarter Guide to Safer Trips.

Frequently Asked Questions

What is the universal emergency number when traveling internationally?

In many countries, 112 works as a universal emergency number, especially across Europe. However, it is not global. The United States and several other countries use 911, while others have their own systems. Always confirm the number for your destination before you arrive.

Will my phone work to call emergency numbers without service?

In many cases, yes. Most smartphones can connect to any available network to place an emergency call, even without an active plan. However, this is not guaranteed in every country or remote area, which is why saving the number and having a backup plan matters.

Should I save emergency numbers in my phone or just screenshot them?

Do both. Save the number in your contacts so you can call quickly, and take a screenshot so you can access it without signal. Screenshots are often faster in real-world situations when your connection is unstable.

What should I do first if something goes wrong abroad?

Start with the basics: get to a safe, well-lit area, assess the situation, and call the local emergency number if needed. If it is not urgent, contact your hotel or host for help navigating local services. Staying calm and having your key information saved ahead of time makes a big difference.

Read More Travel Safety & Planning Guides

Build real-world awareness, avoid common mistakes, and handle travel days with confidence.

Travel Packing & Gear Guide

Carry-on suitcase packed for travel with clothing and essentials in a real-world packing setup laid out on a bed
Home » Travel Planning

Last updated: March 2026 by Corey Gasman

From the Editor:

I do not write packing advice as someone who takes one trip a year and makes a checklist. I write it as someone who has lived out of one backpack for a full year, traveled internationally again and again, and tested this approach across long trips, side trips, weekend getaways, airports, train stations, and constant moving days.

I know what it is like to go a full year without wearing jeans. I know how much value there is in one great pair of lightweight black travel pants that are comfortable, easy to wash, polished enough to wear almost anywhere, and built for real life on the road. That kind of experience changes how you pack. You stop packing like you live at home and start packing for versatility, function, and purpose.

I still travel abroad multiple times a year, so this advice is not static for me. It keeps getting tested, refined, and stripped down to what actually works. This guide is built from that real-world experience, with a focus on lighter bags, smarter systems, and gear that earns its place.

Start Here: What Packing Really Needs to Do

Packing gets easier when you stop packing for possibilities and start packing for the trip you are actually taking. If you are still building your itinerary, start with the Travel Planning Playbook so your packing actually matches your trip.

The right setup should help you do three things well: move easily, stay organized, and avoid friction. That means less digging for chargers, fewer heavy bags, fewer bad clothing choices, and less time wrestling with your stuff in airports, train stations, hotel lobbies, and small rooms. Great packing is usually subtraction, not addition. Start with what you actually need for a normal travel day, then build from there.

Local Guide Tip: If you want a proven, real-world setup you can copy, start with my carry-on-only approach. It is the exact strategy I use to travel light, stay organized, and avoid checking bags when the trip allows it. Related reading: Essential Travel Gear: The Minimalist Packing List That Actually Works

TLGA Packing Rule: Default to carry-on only whenever the trip allows it. The best bag is the one you can move comfortably through a real travel day, not the one that holds the most stuff.

Packing effectively is the difference between a trip that feels like a logistical hurdle and one that feels effortless. When you pack smart, you aren’t just fitting items into a bag; you are designing your daily travel experience to be as smooth as possible.


These are the core guides in this section. Each one solves a different part of the packing puzzle, from choosing a bag to building a repeatable wardrobe to keeping your tech under control.

A traveler seen from behind, wearing a black winter parka and carrying a white document.

The guy in the big down parka is a good reminder: don’t pack your bulkiest coat. For most trips, layering lighter jackets and materials is more flexible, easier to pack, and better for changing conditions. Before you pack, get clear on the trip you’re actually taking. Climate, movement, and daily activities should shape what goes in your bag.



The TLGA Packing Framework

Before anything goes in your bag, run it through this simple filter. This is the fastest way I know to cut clutter without cutting the things that actually matter.

Question What to ask yourself
Mobility Can I comfortably carry this through a real travel day?
Versatility Does it work in more than one setting or outfit?
Frequency Will I realistically use it more than once?
Replaceability Could I buy this easily at my destination if needed?
Friction Does this reduce hassle, or does it create more of it?
Pro Tip: If an item fails two or more of these tests, it usually does not belong in the bag.
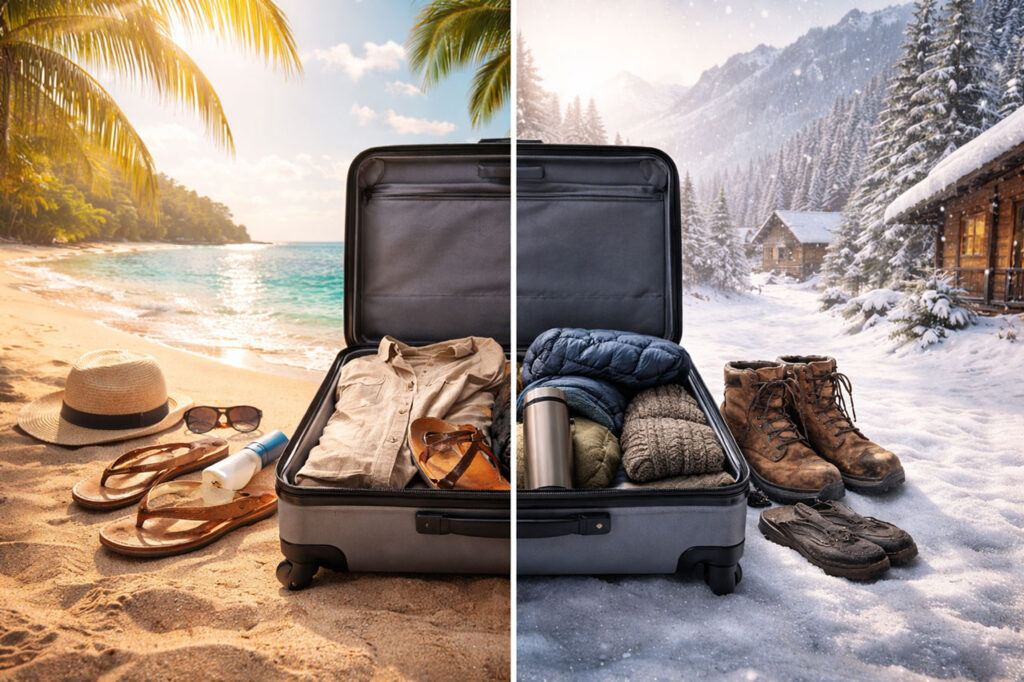
A dual-climate split-screen illustration of an open carry-on suitcase. The left side shows a sunny beach with summer clothes, sandals, and a sun hat; the right side shows a snowy mountain cabin with a winter jacket, boots, and a thermos

A better packing system starts with the trip itself, not the bag. Climate, movement, and laundry access matter more than generic packing lists.


Know Your Trip Before You Pack

Before you pack anything, define the trip you are actually taking. Your destination, pace, and budget all shape what you bring, so it helps to understand your overall costs first using this travel budgeting guide.

  • Warm or cold climate
  • Urban, rural, or outdoor destinations
  • Formal, casual, or adventure-based activities
  • Availability of laundry facilities
  • How often you will change hotels or cities

A destination-first approach prevents overpacking and makes sure everything you bring serves a purpose. The easiest way to overpack is to pack for imaginary scenarios. Pack for your real days, not fantasy emergencies.

Check the limits before you build the bag

Always verify baggage size and weight limits before packing. Knowing these constraints early helps you choose the right luggage and avoid fees, gate checks, or last-minute repacking.

What to check Why it matters
Carry-on size Not every airline uses the same dimensions
Weight limits International carriers can be stricter than U.S. airlines
Personal item rules Affects laptop bags, small backpacks, and under-seat storage
Trip pace Frequent moves reward lighter, simpler setups
Local Guide Tip: Do not pack based on guesses. Check the weather for your exact dates about a week before your trip and adjust your clothing and layers accordingly.

Your setup should match your travel style. A one-bag traveler, a slow traveler, and someone mixing work and travel do not need the exact same luggage.


Choose Your Setup by Travel Style

Not every traveler needs the same gear. The better question is not “What is the best gear?” It is “What kind of trip am I actually taking?”

Travel style Best setup Why it works
One-bag traveler Carry-on backpack + capsule wardrobe + compact tech kit Keeps you mobile and makes moving days easier
Short city-break traveler Carry-on roller + personal item + simple layering pieces Easy airport flow and enough space without overpacking
Long-stay traveler Bigger carry-on or checked bag + laundry plan + repeatable wardrobe Supports real life instead of constant outfit changes
Work-and-travel setup Laptop-ready bag + charger kit + tech organizer Protects the work essentials and reduces cable chaos
Warm-weather trip Breathable clothing + sandals or walking shoes + light day bag Keeps you comfortable without packing a whole second wardrobe

The lighter and more organized your luggage is, the easier every transfer becomes, from airport security to hotel stairs to train platforms.


Carry-On-Only Travel: Why Less Usually Wins

Carry-on-only travel is not about trying to be impressive. It is about reducing drag. Less bulk means less waiting at baggage claim, less stress in transit, less repacking, and fewer chances to lose track of things.

It also makes you more adaptable. You can take stairs without hating your life, change hotels without turning checkout into a project, and move through busy stations or ferry ramps without feeling like you packed your whole closet.

Pro Tip: A backpack does not automatically make you a light packer. The real advantage comes from carrying less, not just carrying it differently.
Two women standing together on a cobblestone street in Europe. One woman wears a green puffer vest over a white hoodie and sunglasses, while the other wears a dark blue denim jacket and a crossbody bag. Historical European architecture and a yellow tram are visible in the background.

A strong travel wardrobe is built around easy rewear, easy layering, and clothes that work across multiple days without needing constant outfit changes.


Clothing Strategy That Actually Works

The biggest clothing mistake travelers make is packing isolated pieces instead of a cohesive wardrobe. A better approach is packing a smaller, more flexible set of clothes that are easier to repeat without feeling sloppy.

That is where a travel capsule wardrobe helps. Instead of packing for every possible version of yourself, you build around a core set of clothes that mix well, layer well, and handle different parts of the trip.

What good travel clothing does

  • Works across multiple outfits
  • Handles repeat wears without drama
  • Matches the climate you are actually visiting
  • Feels good on planes, walking days, and normal evenings out
  • Does not wrinkle into a mess the second it is packed
Pro Tip: Your shoes and outer layer do more work than most of the clothes in your bag. Choose those first, then build the rest around them.
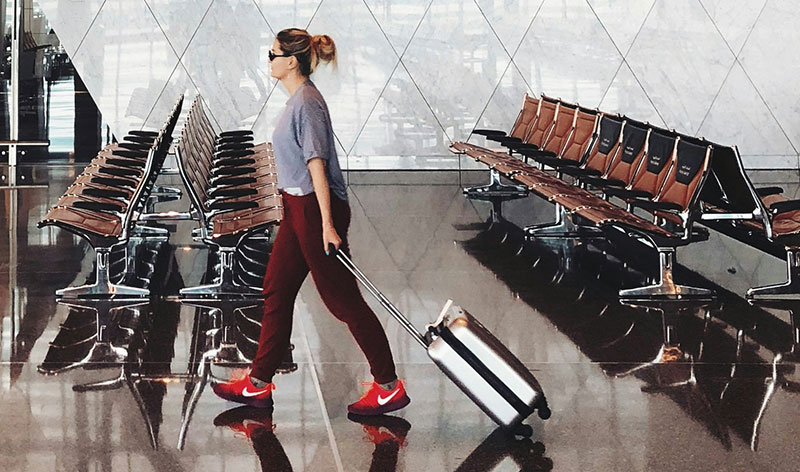
traveler wearing a white top, black leggings, and bright red sneakers pulls a silver carry-on suitcase through a bright, modern airport terminal past rows of empty seating.

Shoes take up space fast, so each pair needs to earn its place and handle more than one kind of day.


Footwear: Build Around One Great Pair

Shoes can make or break a trip. Prioritize comfort, support, and versatility over style-first choices that only work in one setting.

  • Primary walking shoes
  • Secondary shoes or sandals
  • Activity-specific footwear only if truly required

Two pairs is enough for most trips. Three is usually the upper limit unless the trip has a very specific purpose.

Local Guide Tip: Build your footwear around one truly versatile shoe. I always pack a comfortable walking or running shoe that can handle long days on foot, casual workouts, light hikes, and everyday city exploring. From there, add one lightweight secondary option: a simple sandal for warm destinations or a soft, packable slip-on or loafer that bends easily and takes up minimal space.
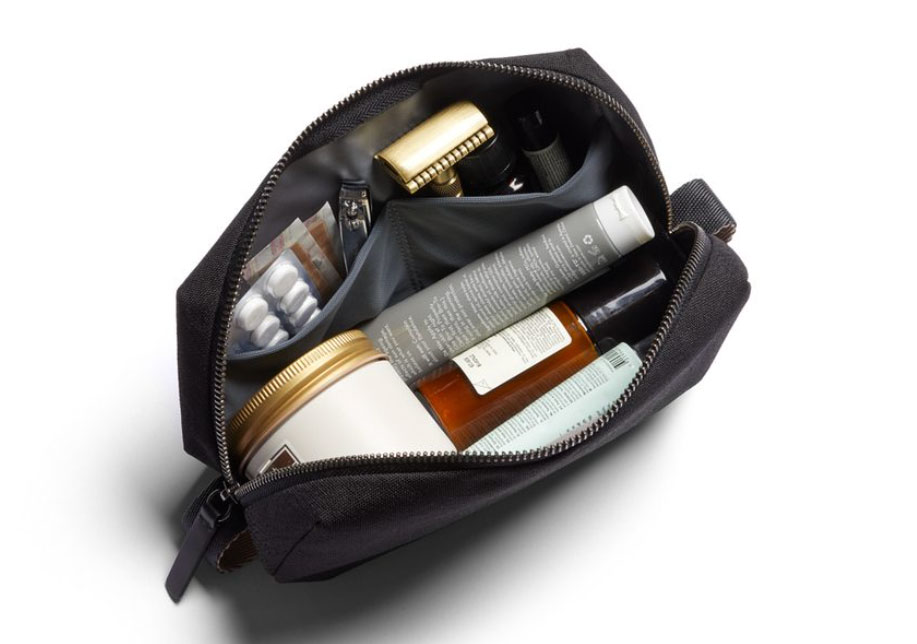
Toiletry Kit close up view form the top down.

Toiletries are one of the easiest places to overpack. Bring what gets you started, then refill or replace the rest if needed.


Toiletries and Personal Care

Toiletries are easy to overdo. For most trips, pack only what you need to get started and avoid carrying bulky backups of common items. Many toiletries can be purchased at your destination, which makes this one of the best categories for packing lighter.

  • Basic hygiene items
  • Medications and prescriptions
  • Sunscreen and skincare essentials
  • Minimal grooming tools
Local Guide Tip: For trips lasting a week, two weeks, or even a month, do not overpack full-size items. Pharmacies and stores around the world sell toothpaste, shampoo, soap, and deodorant. Pack what you need to get started, and pick up everything else as you go.
A male traveler seen from behind with a dark backpack, looking out at a rugged mountain range with prominent, jagged rocky peaks and scree slopes.

A well-packed one-bag setup moves easily through airports and train stations, then doubles as a daypack for hikes, city exploring, and everyday travel.


The Laundry Reality Check

You cannot pack light if you refuse to do laundry. The biggest difference between packing for a five-day trip and a five-week trip is not the wardrobe itself. It is your willingness to wash and repeat.

Instead of bringing two weeks of clothing, bring one week of highly versatile pieces and plan to wash them. This is what keeps a small bag realistic for longer trips and stops a month abroad from turning into a giant suitcase project.

Trip length Best mindset
3 to 5 days Pack enough basics and skip the backup clutter
1 to 2 weeks Repeat your wardrobe and plan one laundry cycle
3 to 5 weeks Use the same core wardrobe and make laundry part of the routine
  • Sink washing: Bring a small amount of travel detergent to wash socks, underwear, or base layers when needed.
  • Drop-off laundry: Many cities have affordable wash-and-fold services that can reset your wardrobe fast.
A black multi-port GaN power adapter plugged into a hotel wall outlet with several USB cables connected. A laptop and a smartphone are charging on a wooden desk next to the adapter in a brightly lit hotel room.

A clean power setup matters more on international trips, long transit days, and work travel when one dead device can throw off the whole day.


Tech, Power & Organization

Travel tech gets messy fast. If this is your first time traveling internationally, it helps to understand how things like adapters, power, and connectivity work ahead of time, which is covered in this First International Trip Guide.

A good tech setup should let you charge what matters, find what you need quickly, and avoid turning your bag into a cable graveyard. Keep power banks, spare lithium batteries, and your most important charging gear in your carry-on or personal item, not in checked luggage.

Item Why it matters
Wall charger Keeps your core devices powered without carrying multiple bricks
Travel adapter Essential for international travel and easy to forget
Power bank Saves long airport days, navigation, and heavy phone use
Tech organizer Keeps the small stuff contained and easy to find
Local Guide Tip: The best charger setup is often one good wall charger plus a few intentional add-ons, not a pouch full of random backup junk.

Minimalist travel begins with your choice of luggage. Committing to a carry-on forces you to pack with purpose and eliminates the temptation of “just in case” items.


Pack for the Airport Day, Not Just the Destination

Friction on a travel day usually peaks at the security line and again during boarding. A smart setup also overlaps with basic awareness and organization, which are covered in this travel safety guide.

Screening rules can vary by airport, scanner type, and whether you have a trusted-traveler lane. The goal is not memorizing every scenario. The goal is keeping your laptop, liquids, chargers, passport, and essentials accessible if needed.

Use a simple transit setup

Where it goes What belongs there
On your body Passport, wallet, phone
Personal item Headphones, charger, medications, snacks, water bottle, sweatshirt
Easy-access pocket Laptop, tablet, liquids bag, documents, pens
Main carry-on Clothing, shoes, and anything you do not need until arrival
Pro Tip: Treat your personal item as your transit survival kit. It should hold the things that matter between your front door and your hotel room.

How you pack matters almost as much as what you pack. A better routine saves time, space, and frustration every single day of the trip.


Packing Techniques That Save Space

How you pack affects comfort just as much as what you pack. A better routine helps you fit more, find things faster, and avoid digging through your bag every morning.

  • Roll, do not over-fold: Rolling many items helps save space and keeps categories easier to see.
  • Layer instead of packing bulk: Lightweight pieces that stack together are more versatile than single heavy garments.
  • Use packing cubes: Separate clothing by category so your bag stays usable after day one.
  • Fill dead space: Stuff socks, chargers, or small items inside shoes.
  • Keep first-night essentials accessible: Do not bury the items you need most right after arrival.
A close-up of a smartphone resting horizontally on a black wireless charging stand with a glowing green indicator light.

The smallest items are often the most underrated, especially on delayed flights, sleep-deprived arrivals, or long moving days.


Small Items That Quietly Make Travel Better

Some of the best travel gear is not glamorous. It is the small item that saves you when your room is too bright, your phone is dying, your bag is disorganized, your water bottle leaked, or your flight gets delayed again.

These are the low-profile items that earn their spot because they solve recurring travel problems, not because they look cool in a packing photo.

  • Sleep and comfort items
  • Organization helpers
  • Compact backup power
  • Simple health and hygiene items
Local Guide Tip: The best small travel items are usually the ones you only notice when you do not have them.
A flat lay of minimalist, black travel gear and accessories organized neatly in preparation for a trip.

Laying out all your items before packing is widely considered a “pro” travel move. This visual “audit” helps you edit your items, and ultimately travel lighter.


Common Packing Mistakes

Bad packing usually comes from the same patterns: bringing too many clothes, packing for unlikely scenarios, duplicating items, and choosing gear for the internet instead of the actual trip.

Packing mistake Better move
Packing too many “just in case” items Pack for your actual daily rhythm
Bringing clothes that do not work together Repeat outfits on purpose and build around versatile pieces
Using too many small pouches with no logic Choose one clear tech organization strategy
Choosing a bag that is too big Build around comfort and mobility
Ignoring weight and comfort until travel day Test your luggage before a big trip
Pro Tip: Pack the bag, carry it around your home or block, and then remove 15 to 20 percent. Most people feel the difference immediately.
A structured, gray carry-on travel backpack standing upright outdoors in warm, golden-hour sunlight.

The right packing list changes with weather, trip length, and how often you will move, wash clothes, or need tech for work.


Pack by Trip Type, Not by Panic

Your setup should change based on climate, pace, and trip style. A weekend city break, a month abroad, and a warm-weather beach trip do not need identical packing lists.

Trip type Packing focus
Weekend city trip Keep it tight, versatile, and easy to carry
Warm-weather international trip Breathable clothes, sun-ready items, and simple footwear
Long multi-stop trip Laundry plan, repeatable wardrobe, and less bulk
Work-and-travel trip Reliable power, laptop protection, and organization
Shoulder-season Europe trip Better layering and one strong outer piece
Local Guide Tip: The weather app should influence your final packing choices more than generic packing lists do.

A smarter packing list is often shaped as much by what you leave out as what you bring.


What I Rarely Pack Anymore

One of the fastest ways to pack better is learning what no longer deserves space in your bag. These are the things I have mostly stopped bringing on normal trips.

  • Extra outfits for every single day
  • More than two pairs of shoes unless the trip clearly requires it
  • Duplicate chargers and random backup cables
  • Full-size toiletries for short or medium-length trips
  • Bulky “just in case” jackets when lighter layers will do the job
  • Heavy guidebooks or paper clutter I can store digitally
Local Guide Tip: Most overpacking starts with fear, not need. Once you trust that you can wash clothes, buy basics, and adapt on the road, your whole system gets lighter.
A traveler seen from behind wearing a bright yellow jacket and a dark day pack on the street.

A quick mobility test before your trip is one of the easiest ways to catch overpacking before it becomes a travel-day problem.


Final Packing Advice

Test and refine

Lay everything out before packing. If you hesitate about an item, you probably do not need it.

Pack with confidence

No packing list is perfect. Most things can be replaced. Smart packing is about preparation, flexibility, and simplicity.

Local Guide Tip: The 20-Minute Test
Before you head to the airport, put on your packed bag and walk around your block for 20 minutes. If you are already stressed or tired by the end, you have overpacked. True travel happiness is being able to comfortably walk to your hotel or navigate a train station without needing a luggage cart.

Read More Travel Planning Guides

Practical guides on planning, packing, safety, budgeting, and travel lifestyle so your trip runs smoother from the start.

START HERE

Travel Planning Playbook

Build a smarter trip from the start with a practical framework for timing, logistics, and decision-making.

Read More

FIRST TIME ABROAD

First International Trip Guide

A practical starting point for passports, logistics, money, and landing abroad with less stress.

Read More

MONEY & COSTS

Money & Travel Budgeting Guide

Plan real costs, avoid budget-killing mistakes, and make smarter money decisions before and during your trip.

Read More

Frequently Asked Questions

What is the best bag for most travelers?

There is no one best bag for everyone. For many travelers, a carry-on backpack or a compact carry-on roller is the sweet spot. The right choice depends on how often you move, how much walking you do, and how lightly you actually pack.

For many trips, yes. It makes moving days easier, cuts down on baggage claim time, and usually leads to better packing habits. But the real win is not the label. It is carrying less and staying organized.

Usually two pairs is enough for most trips: one primary walking shoe and one lighter secondary option. More than that adds bulk fast unless the trip has a very specific need.

If you carry multiple cables, chargers, adapters, or small tech items, yes. It is one of the simplest ways to reduce clutter and make your bag easier to use during the trip.

Overpacking for imaginary situations. Most travelers bring too many clothes, too many backups, and too many items they never touch. Pack for the trip you are actually taking.

No. The better strategy is a small set of pieces that mix well, layer well, and can be repeated. That is what keeps your luggage lighter and your setup more practical.

Airport Security Tips: TSA PreCheck, CLEAR & Global Entry

Airport security feels a lot easier when you build a system before you fly: the right ID, the right lane, the right bag setup, and a few small habits that remove friction.


Home » Travel Planning

Last updated: March 2026 by Corey Gasman

From the Editor:

Airport stress usually starts before the trip even begins. You arrive at the terminal, the lines look long, people are digging through bags, shoes are coming off, laptops are out, someone forgot their ID, and the whole process suddenly feels chaotic.

I travel internationally several times a year and take frequent domestic flights, so I spend a lot of time moving through airports. Over time I’ve learned that the easiest way to fly is not rushing the checkpoint. It is reducing friction before you ever get there.

I have Global Entry and TSA PreCheck, which are massive time savers for anyone who flies regularly. But the biggest improvements usually come from small habits: packing your bag with screening in mind, knowing what stays in your pockets, and even skipping things like belts that slow you down at security.

Airport security is rarely won with one big trick. It is won with small choices that make the process smoother from the moment you leave home.

This guide walks through the systems, programs, and simple habits that make getting through TSA and immigration easier, faster, and far less stressful.

Start here: the airport security system that saves time

The biggest airport security mistake is treating screening like a surprise. Smooth travelers are not lucky; they are prepared for the checkpoint before they get there.

Your job is simple: bring the right ID, choose the right lane, pack your bag so it is easy to screen, wear clothing that does not slow you down, and leave more buffer than your most optimistic self wants to leave. For more planning tips, also read Getting Around Abroad for the bigger airport and transportation planning picture.

The airport security rule that saves trips:

Every extra point of friction multiplies stress. A belt, loose coins, a half-full water bottle, a buried laptop, the wrong ID, boots with laces, or showing up late all make the line feel longer than it really is.

The takeaway: build a repeatable airport routine and security gets dramatically easier.

TLGA Rule: Airport security gets easier when you remove variables before you ever step in line.

Before your next trip

Also read: Getting Around Abroad for the bigger airport and transportation planning picture.

Overhead view of organized travel essentials including a passport, smartphone boarding pass.

Being calm in the security line is not about moving fast. It is about being prepared. Travelers who have their passport and boarding pass ready move through screening with far less stress.


TSA PreCheck: the best value for frequent flyers

If you fly even a handful of times per year, TSA PreCheck is usually the best first upgrade. It does not eliminate security, but it makes the checkpoint process much smoother.

In most PreCheck lanes, you can usually keep your shoes on, leave compliant liquids and your laptop in your bag, and skip the full unpacking ritual that slows down standard screening. That alone removes a lot of airport stress.

Why PreCheck is worth it

  • Less unpacking: fewer bin gymnastics and less repacking after the scanner.
  • Shorter waits: the line is often faster and more predictable.
  • Lower stress: the checkpoint feels more routine, especially on early-morning flights.
Pro Tip: If you only sign up for one airport program, start with TSA PreCheck. It gives the best day-to-day value for most domestic travelers.

Who should get it

TSA PreCheck makes the most sense for:

  • people who fly several times a year
  • travelers who usually carry on instead of checking bags
  • parents who want less chaos at the checkpoint
  • business travelers who care about predictability more than anything

Airport shortcuts work best when you understand what each program actually does. They solve different parts of the airport experience.


CLEAR: faster identity check, not a replacement for TSA

CLEAR helps with the identity-check part before screening. It is not the same thing as TSA PreCheck, and it does not replace it. Think of CLEAR as a front-of-line identity shortcut, while PreCheck changes the actual screening experience.

That is why many frequent travelers who really value speed use CLEAR + TSA PreCheck together. CLEAR can help you get to the front faster, and PreCheck keeps the screening part easier once you get there.

CLEAR vs. TSA PreCheck in plain English

Program What it helps with Best for
TSA PreCheck The actual screening process Most frequent domestic flyers
CLEAR The ID check before screening Travelers at airports where CLEAR is consistently useful
CLEAR + PreCheck Both identity and screening speed Heavy travelers who want the fastest airport routine
Local Guide Tip: CLEAR is only as useful as the airports you actually use. If your home airport or frequent connections do not have strong CLEAR coverage, PreCheck usually matters more.

For international travelers, Global Entry can turn the return-home immigration line from a headache into a much smoother finish to the trip.


Global Entry: the best upgrade if you travel internationally

If you travel abroad with any regularity, Global Entry is one of the best travel investments you can make. It includes TSA PreCheck benefits for eligible members and helps speed up your re-entry into the United States.

This is the program frequent international travelers feel the most. After a long-haul flight, immigration is the last place you want to stand in a slow line while tired and jet-lagged.

Why Global Entry is so valuable

  • Faster re-entry: shorter processing when you arrive back in the U.S.
  • Includes PreCheck: you get domestic security value too.
  • Less post-flight stress: especially useful after international connections and overnight flights.
Pro Tip: If you travel internationally at all, skip the “maybe later” thinking and look at Global Entry first. It gives you both re-entry value and PreCheck value.

TSA PreCheck vs. CLEAR vs. Global Entry cost comparison

If you are trying to decide which airport program is actually worth the money, this is the quick reality check. The best choice depends less on marketing and more on how often you fly, where you fly, and whether your trips are mostly domestic or international.

Program Typical cost Length Best for
TSA PreCheck About $70 to $85 depending on provider 5 years Frequent domestic travelers who want easier screening
Global Entry $120 (often reimbursed by travel credit cards) 5 years International travelers who want faster U.S. re-entry and PreCheck benefits
CLEAR+ $199 to $209 per year Annual membership Heavy travelers at airports where CLEAR consistently saves time
Local Guide Tip: For most travelers, TSA PreCheck is the best value. For international travelers, Global Entry is usually the smarter upgrade because it includes PreCheck benefits too.

The best airport hacks are rarely flashy. They are small habits that remove friction, save minutes, and keep you out of that stressed travel spiral.


Airport security line hacks that actually work

Forget the viral gimmicks. The best airport security hacks are the boring ones that consistently save time.

The line hacks I actually believe in

  • Do not wear a belt: one less thing to remove, carry, and put back on.
  • Use easy shoes: sneakers or slip-ons beat boots and complicated footwear.
  • Empty your pockets before you get in line: wallet, phone, keys, coins, earbuds.
  • Keep your ID and boarding pass in one easy place: never buried in a backpack.
  • Finish your water bottle before security: do not be the person negotiating with physics.
  • Pack your laptop where it is easy to grab: especially if you are not in PreCheck.
  • Do not reorganize at the belt: you should already know where everything is.
Local Guide Tip: The real hack is reducing decision-making. By the time you reach the belt, you should already know exactly what is coming out and what stays in.

What makes lines feel longer than they are

Most bad airport experiences are not caused by one huge problem. They come from five small ones stacked together: late arrival, wrong shoes, buried electronics, overloaded pockets, and uncertainty about the rules.

Take away those variables, and airports instantly feel easier.

Traveling with kids?

  • Children under 12 can usually keep their shoes on at TSA.
  • Baby formula, milk, and toddler drinks are allowed in reasonable quantities.
  • Strollers, car seats, and baby carriers will be screened separately.
  • Give kids their own small backpack so adults are not juggling everything at the belt.

Family tip: Let kids empty their pockets and put small items into their backpack before reaching the scanner. It keeps the process smoother.


The 2026 ID Rules: REAL ID and Digital Wallets

The rules for what gets you through security changed permanently in 2025, and many travelers are still getting caught off guard.

REAL ID is now required for standard domestic screening

As of May 7, 2025, a standard driver’s license that is not REAL ID-compliant is no longer accepted as regular identification for domestic flights at TSA checkpoints. You now need a REAL ID-compliant license, a valid U.S. passport, or another federally accepted form of ID. The TSA provides the official list of accepted IDs on its website.

If your license is not REAL ID-compliant, do not assume you will be waved through. Starting February 1, 2026, some travelers without acceptable ID may still be able to use TSA ConfirmID for a fee, but this is a last resort that can add time and uncertainty and is not something you want to rely on for a smooth travel day.

Mobile IDs (Apple Wallet and Google Wallet)

TSA now accepts mobile driver’s licenses and state IDs at select participating airports and checkpoints. If your state supports it, you may be able to present your ID through Apple Wallet, Google Wallet, or another approved mobile ID system. Still, always carry your physical ID as a backup, since not every checkpoint has the right reader and additional screening can still happen.


How to skip the TSA line for free (Virtual Queues)

One of the more overlooked airport tools right now is the virtual queue. You do not always have to pay for CLEAR or TSA PreCheck to get a faster security experience.

Programs like Reserve powered by CLEAR, along with airport-specific versions such as SEA Spot Saver or MCO Reserve, let travelers book a free time slot for standard security at participating airports. You show up during your reservation window, scan your code if required, and use a dedicated entry point into the standard screening area. If your airport offers it, check a few days ahead, since popular morning slots can fill quickly.


Why the laptop rule keeps changing: CT vs. X-ray scanners

If you are frustrated because TSA told you to take your laptop out in one airport, but leave it in your bag at another, you are not imagining things. The instructions can vary depending on the equipment and the checkpoint.

  • Standard X-ray scanners: officers often require laptops and other large electronics to come out.
  • Newer CT scanners: some checkpoints may allow electronics and compliant liquids to stay in your bag, but the exact instructions can still vary.

The takeaway: do not memorize one universal rule. Watch the signage, listen to the TSA officers, and pack your electronics so they are easy to remove if needed.

Two travelers walking through an airport check-in area with carry-on roller suitcases and backpacks, dressed in casual travel clothing.

A smarter airport day starts before you leave for the terminal. The less you guess about the line, the calmer the trip feels.


How to check your own security wait times the day you fly

This is one of the most useful habits travelers ignore. At major airports, the difference between a slow and fast checkpoint can easily be 30 to 45 minutes. On your flight day, do not just guess how busy the airport will be. Check it.

The best places to check

  • MyTSA app: useful for estimated wait times and historical checkpoint patterns.
  • Your airport website: some airports publish checkpoint updates and lane info.
  • Your airline app: useful for gate changes, delays, and timing pressure even if it does not show checkpoint data.
  • FAA airport status pages: helpful for bigger delay patterns that may affect your travel day.

My flight-day routine

I check my airline app first, then MyTSA, then I leave with enough buffer so I am not trying to win back time in the security line.

When to leave earlier than normal

  • holiday weekends
  • early morning bank of departures
  • major weather days
  • airports known for long lines at certain times
  • any trip where parking, shuttle time, or rental-car return adds friction
Pro Tip: A long line is much less stressful when you expect it. A moderate line feels terrible when you left too late.
Local Guide Tip: Early morning flights often move through security faster because the checkpoint opens with fewer delays in the system. Later in the day, weather delays, missed connections, and airline disruptions can make airport lines much less predictable.
A traveler standing in an airport wearing comfortable pants and slip-on sneakers designed for easy security screening.

What you wear to the airport matters more than people think. Good airport clothing reduces friction, not style.


How to dress for easy airport security screening

Your airport outfit should be built for comfort, movement, and fewer complications at screening.

What to wear

  • Simple shoes: easy on, easy off if needed.
  • No belt: one of the easiest ways to remove friction.
  • Minimal jewelry: keep it simple on travel days.
  • Light layers: airport temperatures swing a lot.
  • Pockets you can manage: not overloaded with loose items.

What I try to avoid

  • boots that are annoying to remove
  • lots of metal accessories
  • clothes that make repacking awkward
  • a jacket stuffed with random travel items
Local Guide Tip: The best airport outfit is one you do not have to think about at the checkpoint. Comfortable, simple, and nothing extra.

A good carry-on setup is not about fitting more in the bag. It is about making screening and the first hour of travel easier.


How to pack your carry-on for less stress

Your bag should be checkpoint-friendly, not just space-efficient.

The easiest carry-on setup

  • Liquids together: keep them easy to access if you need them.
  • Electronics near the top: especially on standard screening days.
  • Documents in one zip pocket: passport, wallet, boarding pass, backup card.
  • No loose clutter: cables, coins, receipts, and random items create friction.
  • Empty water bottle: bring it dry through security, then refill later.

Carry-on reality check:

Most airport stress comes from disorganized bags. The goal is not to pack tighter. The goal is to pack smarter for the checkpoint and the first few hours of the trip.

Need help packing?

Check out my complete Travel Packing Guide to build a smarter bag for your next trip.


TSA liquids rule: the 3-1-1 carry-on limit

The TSA liquids rule for carry-on bags is often called the 3-1-1 rule. It applies to most liquids, gels, and aerosols going through standard security screening. While some new CT scanners allow you to leave liquids in your bag, the 3.4-ounce volume limit still applies unless otherwise posted.

  • 3.4 ounces (100 ml) or less per container
  • 1 quart-sized bag for all liquids
  • 1 bag per traveler

Anything larger usually needs to go in checked luggage. Medications, baby formula, and some medically necessary liquids can exceed the limit but may require additional screening.

Local Guide Tip: Put your liquids bag near the top of your carry-on. If a checkpoint requires it to come out, you will not be digging through your bag at the belt.

Facial recognition is becoming a bigger part of the airport experience, both at security and when returning to the United States from abroad.


The new airport facial recognition: what travelers should know

Facial recognition is increasingly part of the airport experience in the U.S., especially for identity verification and border processing. Travelers are starting to notice it more, so it is worth understanding what it actually means in practice.

At TSA security

TSA has been expanding facial comparison technology and touchless identity options at some airports, especially for eligible travelers in programs like PreCheck. The basic idea is simple: your face is used as another way to verify that you are the person tied to the ID and travel record.

For travelers, the experience is usually faster and more seamless than a manual ID check, but some people are understandably cautious about it.

What matters most for readers

  • You may see more camera-based identity checks at U.S. airports.
  • The goal is faster identity verification, not a different bag-screening process.
  • Travelers should pay attention to airport signage and officer instructions.
  • People who care about privacy should read current TSA and CBP guidance before they travel.
Pro Tip: Whether you love the tech or not, the smart traveler move is knowing what the airport is using before your trip instead of being surprised in the lane.
Travelers rolling luggage through the international arrivals and customs hall after returning to the United States.

After a long international flight, the last thing you want is a confusing arrival process. A little prep on the return side matters just as much as departure day.


Coming back from a trip abroad: immigration, biometrics, and easy wins

For many travelers, returning to the U.S. is the more stressful airport moment. You are tired, possibly jet-lagged, often carrying more stuff than when you left, and just want to get home.

The return-home tools that matter most

  • Global Entry: still the best overall upgrade for frequent international travelers.
  • Mobile Passport Control: a useful free option for eligible travelers who do not have Global Entry.
  • Passport and customs prep: keep documents and arrival details easy to access before landing.

What is changing

CBP continues to expand biometric facial comparison at airports for entry processing. In plain English, that means more travelers will see camera-based identity verification as part of arriving in the United States.

For most travelers, the experience is designed to be faster and more touchless. The bigger lesson is simple: the airport of the next few years will involve more identity tech, not less.

Local Guide Tip: The best international arrival strategy is the same as departure day: reduce friction. Know your program, have your passport ready, and do not wait until you land to figure out the process.

The airport mistakes that slow people down

  • Showing up with the wrong ID: this is a much bigger issue now than people think.
  • Wearing the wrong outfit: belts, hard-to-remove shoes, and too much metal add friction.
  • Not knowing the lane options: standard, PreCheck, CLEAR, or trusted traveler options.
  • Guessing the wait time: instead of checking before leaving.
  • Packing a messy carry-on: especially with liquids and electronics buried.
  • Leaving too late: the mistake that makes every other mistake feel bigger.
Pro Tip: Airport confidence does not come from being a “good traveler.” It comes from having a repeatable process.

Travel Planning Related Articles

Packing, safety, budgets, gear, airport strategy, and food advice to make travel easier from day one.

PACKING GUIDE

What to Pack

A lighter, smarter approach to packing without bringing things you will not use.

Read More

SAFETY GUIDE

Travel Safety Abroad

Practical habits that help you stay aware, prepared, and more confident on the road.

Read More

BUDGET GUIDE

Money, Costs & Budgeting

How to plan expenses, avoid common money mistakes, and travel well without overspending.

Read More

GEAR GUIDE

Essential Travel Gear

The travel gear that actually improves comfort, organization, and the first day of the trip.

Read More

BEGINNER GUIDE

First Trip Abroad

A clear starting point for passports, planning, money, and arriving with less stress.

Read More

FOOD GUIDE

Eating Abroad

How to eat well, skip tourist-trap patterns, and enjoy local food with more confidence.

Read More

Frequently Asked Questions

Is TSA PreCheck worth it?

Yes, for most people who fly regularly, TSA PreCheck is the best first airport upgrade. It usually makes the checkpoint faster, easier, and far less annoying.

Not exactly. They do different things. CLEAR helps with identity verification before screening, while TSA PreCheck improves the actual screening experience. Most travelers get more day-to-day value from PreCheck first.

If you travel internationally even a few times, yes. It speeds up your return to the U.S. and includes TSA PreCheck benefits for eligible members.

You need a REAL ID-compliant license, a valid U.S. passport, or another federally accepted ID for normal domestic screening. Since May 7, 2025, standard non-REAL-ID driver’s licenses are no longer accepted as regular TSA identification.

At some participating airports, yes. TSA accepts mobile driver’s licenses and state IDs at select checkpoints, but availability still varies. Always carry your physical ID as a backup in case the reader is unavailable or additional screening is required.

Check whether your departure airport offers a free virtual queue system, often powered by Reserve. These programs let you book a security time slot online and use a dedicated entry point without paying for a membership.

Use the MyTSA app, your airport website, and your airline app on the day you fly. Together they give a much clearer picture than guessing.

Wear simple shoes, skip the belt, keep jewelry minimal, and avoid stuffing your pockets with loose items. The easiest airport outfit is usually the smartest one.

For most carry-on liquids, gels, and aerosols, TSA uses the 3-1-1 rule: containers of 3.4 ounces or less, all fitting into one quart-sized bag, with one bag allowed per traveler.

The best hack is not one trick. It is a system: the right ID, the right lane, a clean carry-on setup, and arriving with enough buffer that you are not rushed.

It is becoming more common at both TSA identity checks and U.S. immigration processing. The goal is usually faster identity verification, and travelers who want the latest details should review current TSA and CBP guidance before flying.

Italy Train Travel Guide 2026: How to Book Tickets, Validate & Avoid Fines

A hero image for the "Italy Train Travel Guide 2026," showing two high-speed trains (a red Frecciarossa and a red Italo) at a station, a green ticket validation machine, and iconic Italian landmarks including the Milan Duomo, Rome's Colosseum, and St. Peter's Basilica. A digital sign above reads "MILANO CENTRALE" and lists trains to Rome and Florence, with one showing "CANCELLATO". The Italian flag is visible on the right.

Italy Train Travel Guide 2026: How to Book Tickets, Validate & Avoid Fines

A hero image for the "Italy Train Travel Guide 2026," showing two high-speed trains (a red Frecciarossa and a red Italo) at a station, a green ticket validation machine, and iconic Italian landmarks including the Milan Duomo, Rome's Colosseum, and St. Peter's Basilica. A digital sign above reads "MILANO CENTRALE" and lists trains to Rome and Florence, with one showing "CANCELLATO". The Italian flag is visible on the right.

If you are planning a trip to Italy, you have probably heard that “taking the train is easy.” And it is… until you are sprinting through Milano Centrale with 45 seconds to spare, sweating through your shirt because you can’t find your platform, and realizing you never validated your ticket.

I have made every mistake in the book so you don’t have to. I’ve boarded the wrong train, paid the “tourist tax” (fines) for forgetting to stamp my ticket, and hauled luggage up stairs that felt endless.

This guide is the manual I wish I had on day one. It covers everything from the 2026 strike calendar to the difference between Italo and Trenitalia, so you can travel like a pro, not a panicked tourist.

Local Guide Tip: Download the Apps Now
Do not wait until you land. Download the Trenitalia and Italo Treno apps before you leave home. They are essential for checking live delays, buying last-minute tickets, and avoiding paper validation altogether.

Continue Reading: New to international travel or planning a full Italy trip? These guides will help you build the big picture before you dive into train logistics.

Planning note: High-speed trains (Frecce) operate like airplanes: prices go up as seats sell out. Regional trains (Regionale) have fixed prices, so you can buy those tickets 5 minutes before departure without paying extra.

A red Trenitalia Frecciarossa train and a dark red Italo train parked side-by-side at a sunny Italian train platform.

The titans of Italian travel: The red Frecciarossa (Trenitalia) and the dark red Italo train side-by-side at a major station. Both are fast, but the amenities differ.


High-Speed Trains: Trenitalia (Frecce) vs. Italo Explained

Italy has two major high-speed rail competitors, and honestly, they are both excellent.

  • Trenitalia (Frecciarossa/Frecciargento): The state-run giant. They have more extensive routes and more frequency. Their “Executive Class” is the gold standard if you want to splurge.
  • Italo Treno: The private competitor. They often have better sales, cleaner modern cabins, and a dedicated cinema car on some trains. They only serve major hubs (Rome, Florence, Venice, Milan, Naples).

Local Guide Tip: Check Both Prices I always check both apps before booking. Sometimes Italo has a flash sale for €19.90 while Trenitalia is charging €50 for the exact same route and time.

An infographic comparing Italian train types. The left side (red) shows high-speed Frecciarossa and Italo trains with reserved seats. The right side (blue) shows InterCity and Regional trains, highlighting validation rules. A yellow tip box at the bottom explains when to choose each type.

Pin this cheat sheet: Know the difference between high-speed “Frecce” trains (which have assigned seats) and Regional trains (which require ticket validation) to avoid fines.


Italy Train Types Cheat Sheet

Not all trains are created equal. Use this chart to quickly decide which train you need and avoid the dreaded validation fine.

Train Type Best For… Reserved Seat? Must Validate?
High-Speed
(Frecce / Italo)
Major Cities
(Rome, Florence, Venice)
✔ YES
Assigned automatically
NO
InterCity
(IC)
Budget Long Distance
(Slower, cheaper routes)
✔ YES
Assigned at booking
NO
Regional
(Regionale / RV)
Short Day Trips
(like Florence to Pisa or Milan to Lake Como)
✘ NO
Sit anywhere
⚠ YES (Important!)
Stamp paper tickets before boarding

InterCity trains are slower than high-speed but still require seat reservations and do not need validation.

Local Guide Tip: Pick Trains Based on Your Route
If you are going between major cities, always book high-speed for comfort and time. If you are doing short hops (like Florence to Pisa or Venice to Verona), the Regional train is usually the simplest and cheapest move.

The €50 mistake: A tourist gets fined on the spot for forgetting to validate his regional train ticket in the green machine before boarding.


Regional Trains: The “Validation” Rule That Can Cost You €50

This is the #1 way tourists get fined.

  • High-Speed Tickets: These come with a specific seat and time reservation. You do NOT need to validate them. Your ticket is your reservation.
  • Paper Regional Tickets: These are “open” tickets with no date/time assigned. You MUST stamp them in the green/yellow machines on the platform before you board. If you don’t, the conductor will fine you ~€50 per person on the spot. No excuses accepted.
Pro Tip: Buy your regional tickets on the app to skip validation entirely. Digital regional tickets are automatically “validated” for the specific window you select (usually a 4-hour window from the departure time).

Local Guide Tip: Levanto to Cinque Terre (Kiosk + Validation Reality Check)
When we stayed in Levanto to visit Cinque Terre, the train station was the perfect home base because it has a convenient parking lot right next to the station. The tricky part was the kiosk flow and then figuring out the green validation machine on the platform.

We were honestly lucky. A kind local Italian traveler saw us struggling and walked us through buying the ticket and validating it correctly so we could hop the train to the Cinque Terre villages without getting fined.


Split image showing a cheap "Super Economy" ticket price on a smartphone app versus a expensive "Base" price on a ticket kiosk screen.

Strategy matters: Booking 2 months in advance gets you “Super Economy” fares (left), while last-minute bookings mean full “Base” price (right).


When to Book: Advance Tickets vs. Last-Minute Flexibility

The “Super Economy” Hack

High-speed tickets go on sale about 3-4 months in advance.

  • Book Early: If you know your dates (e.g., Rome to Florence on June 10th), book ASAP. You can snag “Super Economy” tickets for €19.90.
  • Book Late: If you wait until the day of travel, that same seat will cost €50–€80 (the “Base” fare).

Regional Flexibility

For slow regional trains (e.g., Florence to Pisa or Pisa to Lucca), prices never change. There is zero benefit to booking these months in advance. Just buy them on your phone while you walk to the station.


A happy family of four sitting together at a 4-seat table section on a modern Italian high-speed train, with scenic rolling hills visible through the large windo

Family travel hack: Booking the 4-seat “salotto” configuration gives you a private table, making it easy to play games, eat snacks, and keep kids entertained on the ride.

Traveling by Train in Italy With Kids: The Rules That Save Money

If you are traveling as a family, trains can be one of the cheapest parts of your Italy trip, but only if you book correctly.

  • High-speed trains: Discounts for children are common, but the exact rules depend on the operator and fare type. When you book in the Trenitalia or Italo app, add each child as a passenger so the discount applies automatically.
  • Under 4 (typical rule): Often free if they do not occupy a seat. If you want a guaranteed seat for a toddler, book them as a regular passenger.
  • Strollers: Allowed. Bring a compact one if possible. Stations often have stairs, and elevators can be crowded or out of service.
  • Best seating move: Choose seats near the luggage racks so you can manage bags and kids without blocking aisles.
Pro Tip: If you are doing a multi-city trip with kids, consider booking high-speed tickets earlier than you normally would. Family-friendly seat pairs and luggage-friendly spots can sell out before the cheapest fares do.
Local Guide Tip: Leonardo Express With Kids
On the Leonardo Express (Rome Fiumicino to Termini), kids under 12 can ride free with a paying adult. It is one of the best transportation deals in Italy.

An electronic train departure board in Italy showing several trains listed as "CANCELLATO" (Cancelled) in red text.

Strike survival mode: An electronic departure board showing “CANCELLATO” (Cancelled). Don’t panic, check the “Guaranteed Trains” list.


Navigating Train Strikes in 2026: Apps and Survival Tips

Strikes (scioperi) are a part of Italian life. They are usually announced weeks in advance, so they rarely come as a total surprise.

  • The “Guaranteed” Hours: Even during a strike, trains usually run during rush hours (6:00–9:00 AM and 6:00–9:00 PM).
  • High-Speed Protection: Frecce and Italo trains are less likely to be cancelled than regional commuter trains.
  • The Resource: Check the website Commissione Garanzia Sciopero (or just Google “Italy Train Strike Calendar”) before your trip.

Local Guide Tip: Have a Backup Plan
If a strike hits, everyone will rush to FlixBus or rental cars. If you see a strike confirmed for your travel day, book a backup bus ticket immediately. You can usually cancel it if the trains end up running.

Local Guide Tip: Our Eurail Strike Lesson (Trains Ran, Ticket Office Didn’t)
We once showed up to buy a ticket from Italy to Nice and hit a strike at the station. The ticket staff were not issuing tickets, but the trains were still running. Since we already had a Eurail pass and a hotel booked in Nice, we walked to the platform anyway. Our train arrived, and when tickets were checked, we explained the situation and showed our Eurail pass. They let us ride.

Takeaway: Strikes can affect services (ticket desks, staffing, validation help) even if some trains still run. Check strike info early, and always have your ticket or pass ready in the app before you arrive.


Interior of an Italian train showing suitcases stored in the overhead rack and larger bags in the rack at the end of the aisle.

Luggage logistics: Large suitcases go in the racks at the end of the car (left), while carry-ons fit perfectly in the overhead shelf (right).


Luggage on Trains: Rules, Storage & Theft Prevention

There are no checked bags on trains. You carry what you bring.

  • Overhead Racks: Fit standard carry-ons and backpacks easily.
  • End-of-Car Racks: For huge checked suitcases. These fill up fast.
  • Behind Your Seat: In some train configurations (especially Business class), there is a “V” space between seat backs where you can slide a medium suitcase.
Theft Warning: While rare on high-speed trains, theft can happen at stations. Never leave your bag unattended on the platform. Once on the train, keep valuables (laptop, camera, passport) in a bag at your feet, not in the rack at the end of the car.

he yellow and blue Leonardo Express train parked at a covered platform at Rome Fiumicino Airport station.

The Leonardo Express: The dedicated airport train connecting Rome Fiumicino to Termini Station. It’s non-stop and immune to traffic.


Getting to Airports by Train: Rome Fiumicino & Milan Malpensa

Do not take a taxi unless you have too much luggage to move. The trains are faster and cheaper.

Rome Fiumicino (FCO)

  • The Leonardo Express: A direct, non-stop train from Fiumicino Airport to Rome Termini Station. It takes 32 minutes and costs €14. It runs every 15–30 minutes.
Local Guide Tip: Leonardo Express Was the Easiest Train Ride of Our Trip
On our most recent Italy trip (last October), we used the Leonardo Express from Fiumicino into Rome and it was smooth from start to finish. We booked in the app, walked straight to the train, and did not have to worry about validation or traffic. No complaints. If you are arriving at FCO, this is the simplest way into the city.
  • Regional FL1: A slower commuter train that stops at other Rome stations (Trastevere, Ostiense, Tiburtina) for €8. Take this if you are staying in Trastevere.

Milan Malpensa (MXP)

  • Malpensa Express: Connects the airport to Milano Centrale and Milano Cadorna. It takes ~50 minutes and costs €13.

A tourist using a red Trenitalia ticket machine, touching the screen to select the English language option.

At the kiosk: A step-by-step view of buying a ticket. Look for the British flag icon to switch the language to English first.


Step-by-Step: How to Buy a Ticket at the Station Kiosk

If your phone dies or the app crashes, you need to use the big red (Trenitalia) or grey (Italo) machines.

  1. Touch the screen to wake it up.
  2. Select Language: Tap the British/US flag icon immediately.
  3. Enter Destination: Type the Italian name if possible (e.g., “Firenze” instead of Florence) to be safe, though most recognize English now.
  4. Select Time: Scroll through the options. Pay attention to “Cambio” (changes). Try to pick a “Diretto” (direct) train.
  5. Pay: Insert your card (chip first). Most machines also take cash, but cards are faster.

Local Guide Tip: Station Names Matter
Cities have multiple stations. Ensure you pick the right one:

  • Rome: Roma Termini (Central) vs. Roma Tiburtina (Secondary)
  • Florence: Firenze S.M. Novella (Central) vs. Firenze Campo di Marte (Outside center)
  • Venice: Venezia Santa Lucia (On the island) vs. Venezia Mestre (Mainland suburb)

Final Tip: Italy’s train system is incredibly efficient once you understand the rules. If you can master validation, booking timing, and strike awareness, you’ll move around Italy faster than most locals.

FAQs

Absolutely. It is almost a tradition. I often grab a panini, a bag of chips, and even a bottle of wine (with plastic cups) for the ride. Just be respectful of your neighbors and clean up your trash.

For trips under 2 hours (like Rome to Florence), Standard class is perfectly fine. For longer trips (Rome to Venice), Business Class is worth the extra €10–€20 for the wider leather seats, more legroom, and quieter cabin.

Yes, Frecciarossa and Italo trains have free Wi-Fi. However, it can be spotty in tunnels and rural areas. Do not rely on it for a critical Zoom call.

If you have a “Base” ticket, you can usually change it to the next train for free (within an hour). If you have a “Super Economy” or “Economy” ticket, it is usually non-refundable and non-changeable. You will likely have to buy a new full-price ticket.

Generally yes, but major stations (Rome Termini, Milan Centrale, Naples Centrale) can get sketchy late at night. Stick to the main well-lit areas, avoid empty corners, and keep your bags attached to you.

First-Timer’s Guide to Japan: Essential Logistics, Etiquette & Pricing

Couple of tourists visiting a traditional Japanese temple in autumn, standing on a stone walkway surrounded by fall foliage and other visitors

First-Timer’s Guide to Japan: Essential Logistics, Etiquette & Pricing

Couple of tourists visiting a traditional Japanese temple in autumn, standing on a stone walkway surrounded by fall foliage and other visitors

By Corey Gasman

Japan is the only country I know where the anxiety of planning the trip is almost as high as the excitement of taking it. The train maps look like a bowl of spaghetti. The etiquette rules feel like a minefield. And everyone seems to have a different opinion on whether the JR Pass is still worth it in 2026.

Here is the honest truth: Japan is not difficult; it is just different. The systems work perfectly, but they don’t work the way you are used to.

For me, the moment Japan “clicked” wasn’t at a temple or a shrine. It was when I realized I could forward my heavy suitcase to my next hotel for $15 instead of dragging it through a crowded station. Once you learn the logistics, the country opens up.

Planning note: Do not over-plan your days. Japan is dense. A “15-minute walk” often takes 45 minutes because you will stop to look at five vending machines and a shrine along the way.

First-person view of a traveler tapping a green Suica IC card on a subway ticket gate in a busy Tokyo station

Tapping through a ticket gate in Tokyo. In 2026, you likely won’t even need a physical card, your phone is your ticket.


The IC Card: Your Key to the City

If you only do one logistical thing before you arrive, make it this: get your IC Card sorted. An IC card (Suica, Pasmo, or ICOCA) is a reloadable prepaid card you use for trains, buses, vending machines, and convenience stores.

In 2026, physical cards can still be hard to find due to lingering chip shortages. The solution is digital.

Guide Tip: Set Up Mobile Suica Before You Fly

If you have an iPhone, you do not need a physical card.

1. Open Apple Wallet.
2. Tap the “+” sign.
3. Search for “Suica” or “PASMO.”
4. Add money using a Mastercard or Amex (Visa sometimes fails with foreign cards).

You can now tap your phone at any ticket gate in Japan, even if your phone is asleep. You do not need to open the app. It just works.

Pro Tip: If you are on Android/Google Pixel, foreign phones often don’t work with Mobile Suica due to hardware differences (FeliCa chips). You will likely need to buy a physical “Welcome Suica” or “Pasmo Passport” at the airport upon arrival.
Illustration showing Japan’s takkyubin luggage forwarding service, with travelers sending suitcases ahead to hotels and destinations across Japan

Japan’s takkyubin luggage forwarding system lets travelers send their bags ahead, making train travel and city hopping easy and stress-free.


Luggage Forwarding (Takkyubin): A Non-Negotiable

Do not be the tourist dragging two massive suitcases onto a rush-hour train in Shinjuku. It is stressful for you and annoying for locals.

Japan has a miraculous system called Takkyubin (Luggage Forwarding). For about ¥2,500 (roughly $16–$18 USD), you can send your suitcase from your hotel in Tokyo to your hotel in Kyoto. It usually arrives the next day.

Most hotels will handle the paperwork for you. You just pack an overnight bag, hand over your big suitcase at the front desk, and walk to the train station hands-free.

Local Guide Tip: If you are staying at an Airbnb, you can drop luggage off at most convenience stores (look for the Black Cat logo).
Pro Tip: On the Shinkansen, if your bag is over 160cm (total dimensions), you MUST reserve a “seat with oversized baggage area.” If you don’t, you will be fined.
Hand holding multiple Japan Rail Passes in front of a Shinkansen bullet train at Tokyo Station

The Shinkansen platform. Since the price hike, the “point-to-point” ticket is often the smarter buy.


The 2026 JR Pass Verdict: Probably Skip It

For decades, the JR Pass was a no-brainer. That changed with the massive price hike in late 2023. In 2026, for a standard “Golden Route” trip (Tokyo -> Kyoto -> Osaka -> Tokyo), the 7-day pass is more expensive than buying individual tickets.

Unless you are taking long-haul trips (like Tokyo to Hiroshima to Kyushu and back) within 7 days, buy point-to-point tickets. It gives you more flexibility and lets you ride the fastest trains (Nozomi), which the pass previously restricted.

Local Guide Tip: Buy Shinkansen tickets via the “SmartEX” app or website 30 days in advance for discounts.

7-Eleven ATMs are the lifeblood of international travel in Japan. They are everywhere and always work.


Cash is (Still) King, But Cards are Queen

Japan has modernized rapidly, but you still need cash. While department stores, hotels, and most restaurants take Visa/Mastercard, many ramen shops, ticket machines, and temples are cash only.

Do not exchange money at your home bank (the rates are terrible). Just bring your debit card and go to a 7-Eleven or Lawson ATM upon arrival.

Local Guide Tip: Always carry a coin purse. You will accumulate significant value in 100 and 500 yen coins quickly.
Pro Tip: 7-Eleven ATMs have the best acceptance rate for foreign cards and offer fair exchange rates.

Inside a Japanese bullet train, where passengers ride quietly, respectfully, and comfortably as the Shinkansen speeds across the country.


Etiquette: It’s About Awareness, Not Rules

You don’t need to stress about bowing perfectly. Japanese people know you are a foreigner. The biggest rule to follow is: Don’t be a nuisance.

  • On Trains: It is dead silent. Do not talk on the phone. Keep conversations to a whisper.
  • Walking & Eating: generally frowned upon in cities. If you buy street food, stand near the stall to eat it, then toss the trash in their specific bin.
  • Trash: There are no public trash cans. You must carry your trash with you back to your hotel or find a convenience store bin.
  • Escalators: Stand on the left, walk on the right (except in Osaka, where it’s reversed!). Follow the person in front of you.
Local Guide Tip: Bring a small plastic bag in your daypack to carry your trash.
Anime-style illustration of a tourist in Tokyo holding trash and placing it into their backpack on a spotless, crowded street with no public trash cans visible

A familiar moment for first-time visitors to Japan: realizing there are no public trash cans, and learning to carry your trash until you get home or back to your hotel.


Local Guide Tip: The “Last Order” Rule (L.O.)In Japan, closing time does not mean last entry.

If a restaurant is listed as open until 11:00 PM, the Last Order (L.O.) is usually 30–60 minutes earlier. That means food orders often stop around 10:00 or 10:30 PM.

Walk in after L.O. and you will get a polite bow, crossed arms in an “X,” and a gentle refusal, even if diners are still eating inside.

Rule of thumb: arrive at least 45 minutes before the posted closing time.

In Japan, tipping is not expected. Staff will politely refuse extra cash, as great service is already included.

Eat Like a Local: Japan Dining Basics First-Timers Should Know

Japan’s food culture is built on respect, rhythm, and restraint. Restaurants value quiet conversation, clean habits, and efficiency over lingering or loud dining. Eat what you order, follow the room, and do not rush the experience. Small gestures matter here.

Quick local rules to remember:

  • Slurping noodles is normal. Talking loudly is not.
  • No tipping. Ever.
  • Don’t eat or drink while walking.
  • Carry your trash with you if there’s no bin.
  • Watch what locals do and mirror it.

If you do that, you’ll fit in just fine.

Local Guide Tip: Real Etiquette Traps (Not the Ones You Expect)These are the behaviors that actually make staff uncomfortable:

• Skip strong perfume or cologne
At sushi and Wagyu counters, strong scents ruin delicate aromas. Some chefs will refuse service.

• Never tip
Tipping is confusing, not polite. Staff may chase you down to return the money.

• Don’t pass food chopstick to chopstick
This is a funeral ritual in Japan. If sharing food, place it on a plate first.

FAQs

No. Tipping is not part of the culture and can actually cause confusion or offense. Excellent service is the standard, not an extra. A simple “Arigato gozaimasu” is all that is needed.

Prices have risen. Budget roughly ¥15,000–¥20,000 ($100–$135 USD) per person per day for mid-range travel (excluding flights). Hotels in Tokyo now average $150–$250/night for decent 3-star business hotels.

In major tourist areas, yes. In rural areas, no. But Google Translate (Camera mode) and kind locals make communication very manageable.

How to Watch Sumo in Japan: Tickets, Tournaments & Stable Visits

Two sumo wrestlers (rikishi) locked in a powerful grapple during a match in a traditional clay ring (dohyo).

How to Watch Sumo in Japan: Tickets, Tournaments & Stable Visits

Two sumo wrestlers (rikishi) locked in a powerful grapple during a match in a traditional clay ring (dohyo).

By Corey Gasman

Watching sumo in Japan is not just a sporting event. It is ritual, discipline, and theater rolled into one experience. You feel it the moment you walk into the arena: the hush before impact, the salt thrown to purify the ring, and the sudden shockwave when two wrestlers collide.

If you are visiting Japan in 2026, sumo is one of the most uniquely “only in Japan” experiences you can add to your trip. The good news is that it is easier than ever to buy tickets, understand what you are watching, and even see morning training if you do it the right way.

This side story walks you through tickets, tournament strategy, the history behind the rituals, how to watch stable practice respectfully, what sumo wrestlers eat, and what the sport looks like right now.

Planning Note

If you only have one shot at sumo, aim for a Tokyo tournament day in the final week. If you want the best value, go on a weekday and sit in arena seats, then explore the Ryogoku neighborhood before or after.

A group of sumo wrestlers (rikishi) standing inside a circular clay ring (dohyo) during a traditional ceremony.

Sumo is part sport, part ceremony. Even the warmups and pre-match rituals are worth arriving early to witness firsthand.


Sumo History and Rituals: Why It Feels So Different

Sumo is Japan’s oldest organized sport, and it began as a Shinto ritual performed to honor the gods and pray for good harvests. That origin is why the arena feels sacred in a way most sports venues do not. The ring (the dohyo) is treated as holy ground. Salt is thrown to purify it. Wrestlers stomp to drive away bad spirits. Referees wear robes that look more like a priest’s attire than an umpire’s uniform.

Over centuries, sumo evolved from seasonal rituals into professional competition. By the Edo period, the sport was formalized with rankings and tournament-style events. What makes modern sumo so compelling is how many traditions survived. When you watch a top-division bout today, you are seeing something that still carries the rhythm and symbolism of its earliest roots.

Local Guide Tip: Even if you do not understand all the rituals, pay attention to the small things: the salt throw, the careful foot placement, the stare-downs, and the referee’s movements. It is a language of respect and intimidation happening at the same time.
Pro Tip: If you want a quick crash course before you go, learn these three terms: dohyo (ring), rikishi (wrestler), and kimarite (winning technique). You will follow the action faster.
wo sumo wrestlers engaged in a match at the Ryogoku Kokugikan in Sumida City, Tokyo, Japan.

Where to Watch Sumo: The 6 Grand Tournaments

Japan has six official grand tournaments (honbasho) each year, lasting 15 days each. They rotate across the country:

  • Tokyo: January, May, September
  • Osaka: March
  • Nagoya: July
  • Fukuoka: November
Local Guide Tip: Tokyo is the easiest for first-timers because it has the most English-friendly infrastructure, and the Ryogoku area is built around sumo culture. If your schedule is flexible, pick Tokyo.
Pro Tip: The final weekend is the most electric, but also the hardest to get tickets for. If you want a lively crowd with better availability, choose days 9 to 12 on a weekday.

How to Buy Tickets in 2026 (Without Getting Burned)

Sumo tickets typically go on sale roughly one month before the tournament starts, and popular days sell out quickly. In 2026, you have four realistic paths, and the right one depends on how much certainty you want.

1) Official ticket sales: The best option if you plan ahead. You get real pricing, real seat maps, and a straightforward purchase process for major tournaments.

2) Convenience store tickets: Lawson and 7-Eleven often sell seats via in-store kiosks. This can be cheap, but it is Japanese-first and not beginner-friendly.

3) Tour companies and hotels: Great if you want your ticket handled, sometimes bundled with an audio guide or escort to your section. You pay more, but you remove friction.

4) Same-day tickets: Limited and not guaranteed. If you are on a tight budget and have time to queue early, it can work, but do not build your whole plan around it.

Local Guide Tip: If you are traveling during a Tokyo tournament, buy tickets before you arrive. Leaving it to chance is fine for a weekday, but risky for weekends.
Pro Tip: Avoid sketchy resale sites. If the price looks too good or the seller cannot explain the seating category clearly, walk away. Use official channels or reputable tour providers.
An anime-style illustration of fans in traditional box seating at a sumo tournament, cheering with snacks, drinks, and a Japanese flag as wrestlers compete in the background.

Experiencing the electric atmosphere of a sumo match from the traditional ringside box seats (masu-seki).


Best Seats and What to Expect Inside the Arena

Sumo seating falls into a few categories. The right choice depends on your comfort level and how long you plan to stay.

Box seats: Traditional floor seating where you sit on cushions. It is the classic experience, but it can be tough on knees and backs. Shoes off, and you are seated low to the ground.

Arena seats: Standard chairs in the stands. This is the best pick for most travelers. Comfortable, good sightlines, and usually more affordable.

Ringside: Extremely close and expensive. It is thrilling, but be aware that wrestlers can fly out of the ring. You may literally need to brace.

What First-Time Visitors Are Most Surprised By

  • How fast matches end. Many last only seconds.
  • How quiet the arena can feel right before a bout.
  • How engaged and knowledgeable the crowd is.
  • How easy it is to follow along without speaking Japanese.
Seat Category Weekend (JPY/USD) Weekday (JPY/USD) Capacity
🏆 Ringside ¥20,000 (~$126) ¥20,000 (~$126) 1 Person
🎎 Box Seats (A-C) ¥38k-¥52k (~$240-$328) ¥34k-¥48k (~$215-$303) 4 People
🏟️ Arena Seats (S-A) ¥7k-¥9.5k (~$44-$60) ¥6.5k-¥9k (~$41-$57) 1 Person
🎟️ Arena Seats (B-C) ¥4k-¥5.5k (~$25-$35) ¥3.5k-¥5k (~$22-$31) 1 Person

*Estimates based on early-2026 exchange rates. Actual USD prices vary with the yen.

A wide-angle view of a professional sumo tournament at the Ryogoku Kokugikan, showing dozens of rikishi standing in the dohyo during the opening ceremony.

Grand Entrance: The opening ceremony of a professional tournament, where rikishi from the top divisions gather in the ring to greet the crowd.


How a Tournament Day Works (So You Do Not Show Up at the Wrong Time)

A full sumo day is long, and it is designed in layers. Lower divisions compete earlier in the day, and the top division closes the afternoon. If you arrive only for the final hour, you will still see the biggest bouts. But you will miss the slow build that turns the day into an event.

In practical terms, here is the rhythm. Morning is quieter, with smaller crowds and a relaxed pace. Midday brings more energy, more food and drink, and a steadier flow of action. Late afternoon is when the arena feels fully alive, especially when the ranked wrestlers enter with ceremony and the matches become more consequential.

Three fans smiling and eating traditional bento boxes with cold beers while watching a live sumo wrestling match from the stadium seats.

Experiencing the atmosphere: Fans enjoy a traditional bento meal and drinks while cheering on their favorite wrestlers at a sumo tournament.


Food, Drinks, and Arena Culture

Yes, eating and drinking is part of the experience. Beer, sake, bento boxes, and snacks are widely available inside the arena. Many locals treat sumo as an all-afternoon social event, especially on weekends.

Local Guide Tip: If you only want a half day, arrive around mid-afternoon. You will catch the pageantry, the crowd energy, and the top-division matches without needing to commit to the full schedule.
Pro Tip: Do not underestimate how fast matches end. Blink and it is over. Watch the pre-bout posture, hand placement, and the tension of the start. That is where a lot of the story lives.
Planning a Tokyo itinerary? Pair your sumo day with nearby neighborhoods like Asakusa and Ueno for museums, markets, and evening dining.
A sumo wrestler practicing traditional movements inside the historic Sumiyoshi Jinja shrine in Hakata Ward, Fukuoka, Japan.

Morning training is intense, quiet, and deeply hierarchical. You are a guest in their home, not an audience at a show.


How to Visit a Sumo Stable and Watch Morning Training

Seeing a sumo stable (heya) is one of the most unforgettable ways to understand the sport. Stables are where wrestlers live, train, eat, and follow strict seniority rules. Training sessions often start early, sometimes around 6:00 am, and can last for hours. Junior wrestlers begin first. Seniors join later. The whole environment is disciplined and serious.

In 2026, some stables still allow visitors, but access is controlled and etiquette expectations are high. The most reliable method is booking through a reputable tour company that has existing relationships and clear rules. Some hotels and cultural programs can also help arrange visits. Reaching out directly can work if you speak Japanese and understand the culture, but it leaves little room for mistakes.

Local Guide Tip: Book a stable visit as early as you can, especially during tournament months. Demand spikes when travelers realize it is even possible.
Pro Tip: If you are sensitive to sound and impact, be prepared. Training is loud, repetitive, and physical. The slams are real, and you are often closer than you expect.

Training Etiquette: The Rules You Must Follow

Stable practice is not a performance for tourists. It is work. That means the rules are strict, and following them is part of showing respect. Some stables allow photos, others do not. Many prohibit flash entirely. Most require silence, no wandering, and no entry or exit once practice begins. Dress modestly and keep your phone away.

Think of it like being invited into someone’s home during a serious family ritual. You are there to observe, not to take up space. If you follow instructions and stay unobtrusive, you will be welcomed. If you treat it like a spectacle, you will not.

Local Guide Tip: If you are unsure, copy what the most respectful person in the room is doing. Quietly. That is the safest play in Japan.
Pro Tip: Arrive early and use the restroom beforehand. Many visits do not allow breaks once the session begins.
An anime-style illustration of four cheerful sumo wrestlers sitting around a large steaming pot of Chankonabe, holding bowls of rice and smiling.

Chanko nabe is the iconic sumo meal. It is protein-heavy, balanced, and built for recovery.


What Sumo Wrestlers Eat: Chanko Nabe and the Daily Routine

The stereotype is that sumo wrestlers just eat huge portions all day. The reality is more structured and athletic. Sumo bodies are built intentionally through intense training, timing, and calorie strategy. The signature dish is chanko nabe, a hearty hot pot loaded with protein and vegetables. It can include chicken, fish, tofu, mushrooms, cabbage, and rich broth, usually served with rice and side dishes.

A classic routine is morning training on an empty stomach, followed by a large late-morning meal. After that comes rest, often a long nap, and then another substantial meal later in the day. The timing matters. Eating after training helps the body absorb calories efficiently, and the rest period supports weight gain and recovery.

Local Guide Tip: Try chanko nabe in Tokyo’s Ryogoku neighborhood, where many restaurants are run by retired wrestlers. It is one of the easiest ways to connect your tournament day with the culture around it.
Pro Tip: Go with friends and order a shared set. Chanko is meant to be communal, and you will get a better variety than ordering solo.
A black and white photo of two sumo wrestlers (rikishi) training outdoors, with one wrestler lifting the other in a demonstration of strength.

Strength and tradition: A historical look at rikishi training, highlighting the physical discipline that has defined the state of sumo for generations.


The State of Sumo in 2026: Tradition, Popularity, and Change

In 2026, sumo is both stable and evolving. The core of the sport is still fiercely traditional. Rankings remain strict, and the Japan Sumo Association maintains tight control over tournaments, discipline, and public image. That conservatism is part of what makes sumo feel timeless, but it also means change arrives slowly.

At the same time, sumo is increasingly accessible for travelers. Ticketing has improved, English resources are more common, and guided experiences make it easier to understand what you are seeing. Social media and documentaries have also helped bring new fans into the sport, including younger Japanese audiences and international visitors.

International wrestlers continue to play a major role at the top levels, which sparks debate among purists but also raises the athletic standard. Meanwhile, there is ongoing public conversation around modernization, governance, and inclusivity. Amateur women’s sumo exists, but professional sumo remains male-only, and that is unlikely to shift quickly. The result is a sport that feels deeply rooted, yet constantly discussed in modern terms.

Local Guide Tip: If you want to learn more without overthinking it, talk to locals in the arena. Many fans love explaining rankings and rivalries, especially if you show genuine curiosity.
Pro Tip: If you only have time for one sumo-related activity, choose the tournament first. Stable practice is incredible, but it is harder to arrange and more restrictive.

📺 Must-Watch Before You Go

To truly understand the spirit of the sport, watch Sanctuary on Netflix. This 2023 drama dives into the gritty, traditional world of sumo through the eyes of a delinquent-turned-wrestler. It is a hit for its realistic portrayal of ancient rituals and modern ambition.

FAQs

Any tournament month works, but Tokyo (January, May, September) is the easiest for travelers. If you want the biggest energy, choose the final weekend. If you want better ticket availability, go on a weekday in the second week.

You can absolutely go for just the late afternoon. That is when the top division competes and the arena is at its most exciting. If you enjoy pacing and atmosphere, arriving earlier adds depth, but it is not required.

Arena seats are usually best. They are comfortable, affordable, and still give great views. Box seats are iconic, but can be uncomfortable if you are not used to floor seating.

The most reliable way is booking through a reputable tour company or a program that arranges permission in advance. Direct contact is possible, but etiquette is strict and Japanese language ability helps a lot.

Dress modestly, arrive early, and stay silent. No flash photography, no wandering, and no entering or exiting once practice begins. Treat it like observing serious work, not watching a show.

Yes. Chanko nabe is widely available, and Ryogoku in Tokyo is the best neighborhood for it. Many chanko restaurants are operated by retired wrestlers and are very welcoming to visitors.